
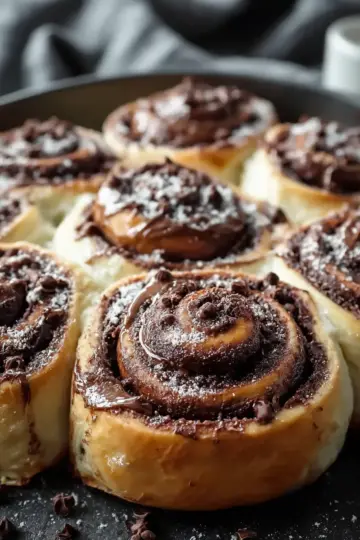
Introduction to No-Bake Oreo Truffles
When it comes to dessert, who has the time for elaborate recipes? No-Bake Oreo Truffles are a game changer for busy professionals navigating work, social commitments, and endless to-do lists. These little bites of joy come together in under 30 minutes, making them the perfect sweet treat to whip up quickly. Imagine impressing friends or colleagues with a crowd-pleasing dessert that requires minimal effort but delivers maximum flavor.
But why are no-bake desserts like these truffles so appealing? First, they eliminate the need for an oven, allowing you to focus on other tasks. They also typically have fewer steps compared to traditional baking, cutting down prep time significantly. No-bake options are often versatile and just as satisfying—check out this article on the benefits of no-bake desserts for more insights!
And let’s be honest, with ingredients like Oreo cookies and cream cheese, who can resist? Plus, you can customize them by incorporating your favorite toppings, whether that’s sprinkles or crushed Oreo crumbs. Ready to dive into this easy, creamy, and irresistible recipe for No-Bake Oreo Truffles? Let’s get started!
Ingredients for No-Bake Oreo Truffles
Key ingredients for a deliciously creamy treat
Creating your very own No-Bake Oreo Truffles is a delightful adventure in the kitchen, and it all begins with just a handful of simple ingredients. Here’s what you’ll need to whip up this creamy, mouthwatering dessert:
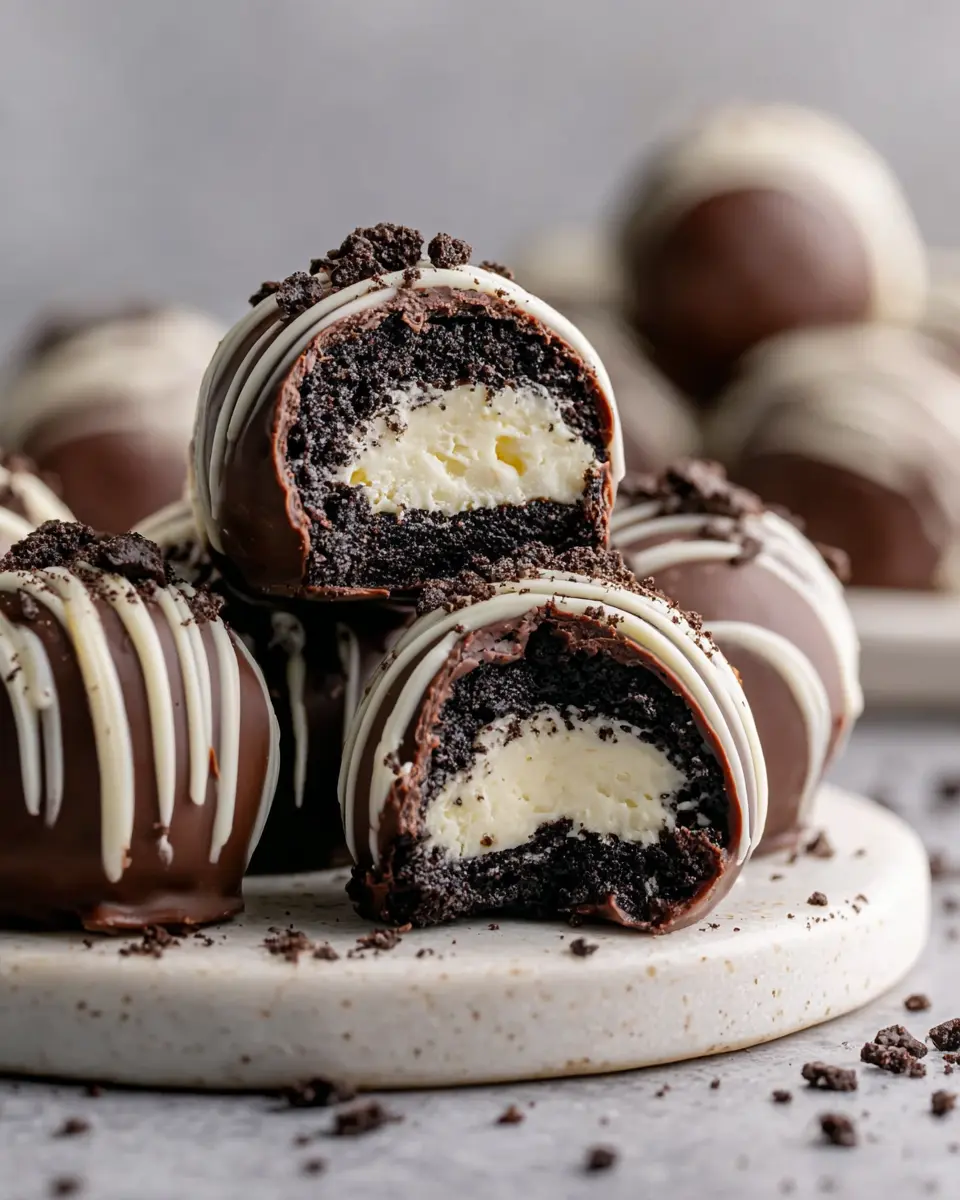
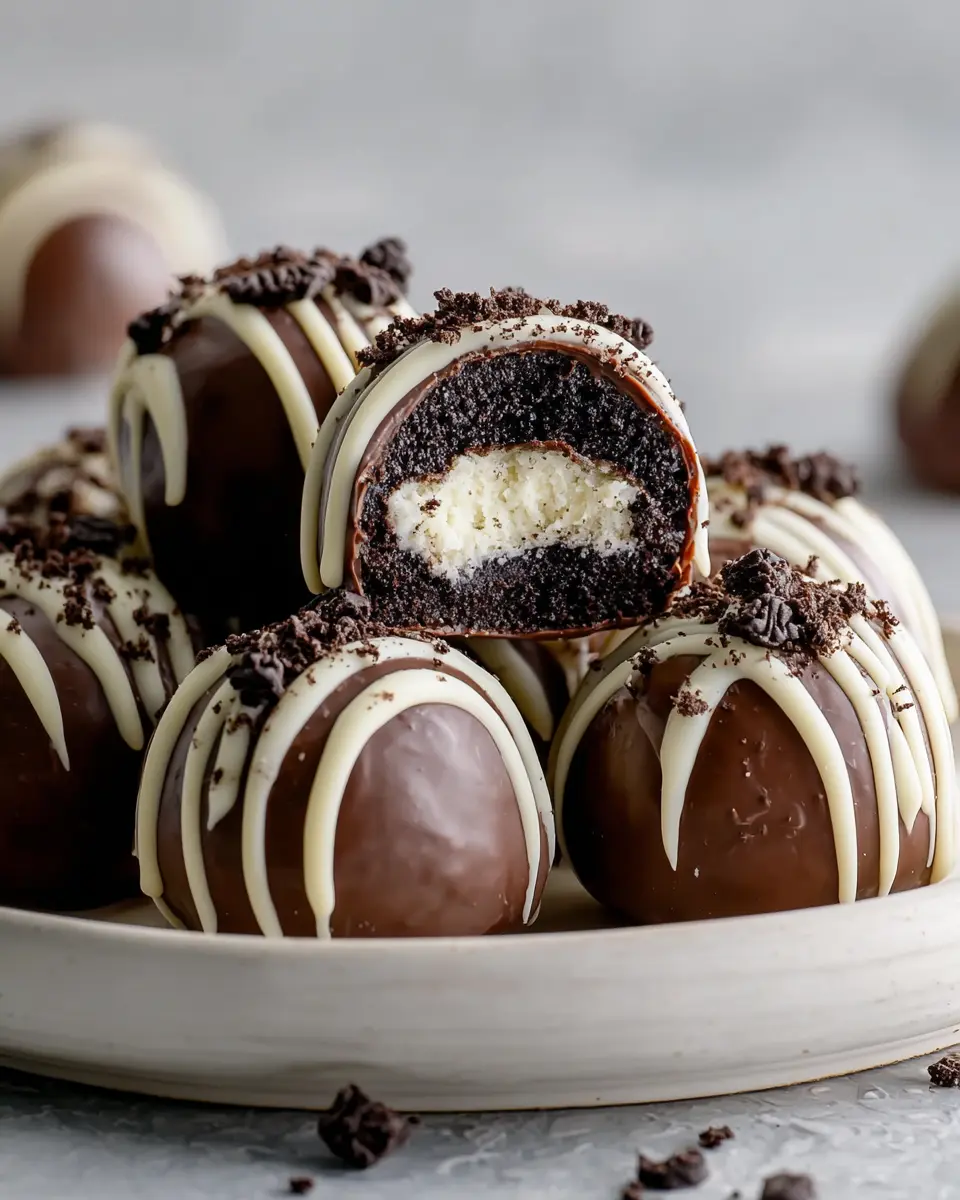
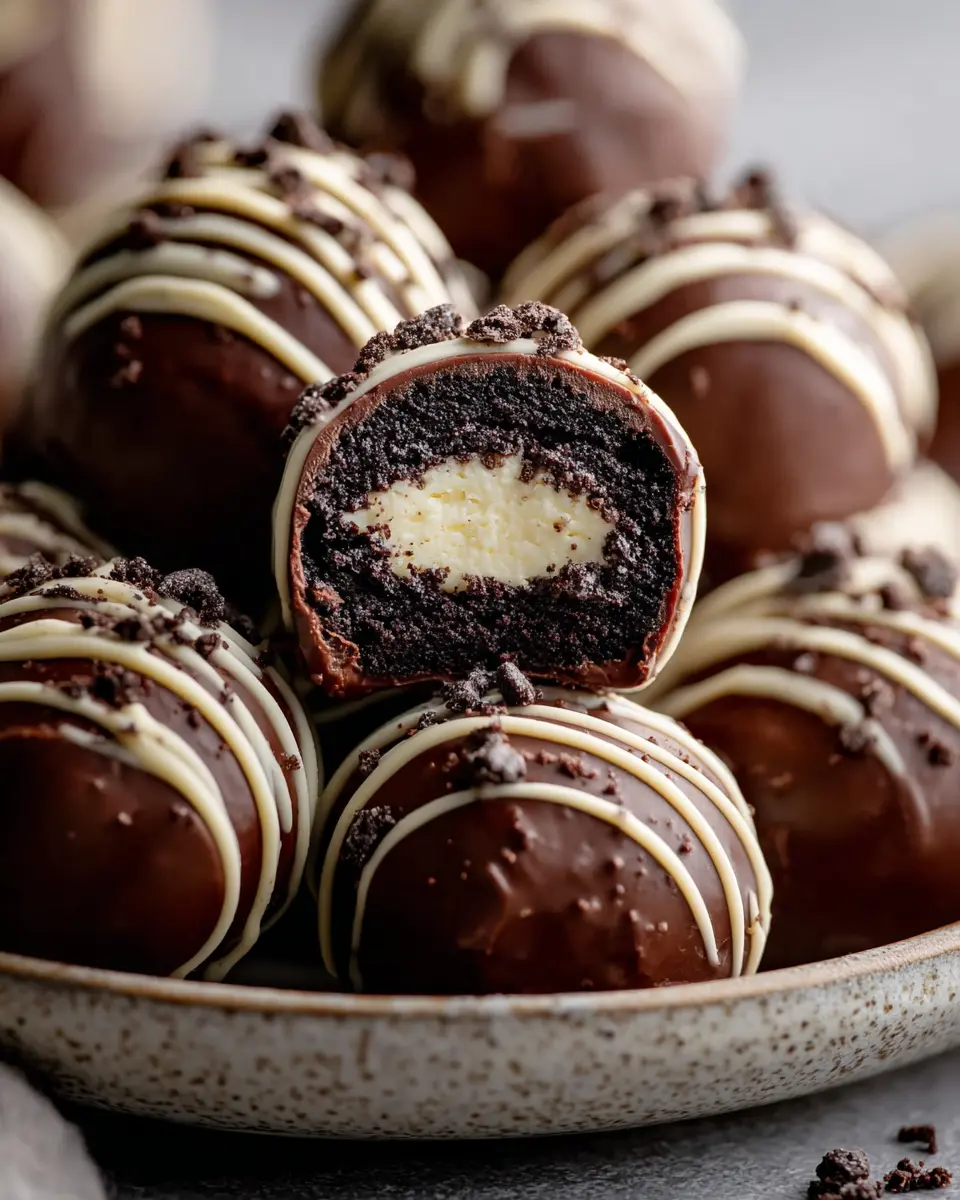
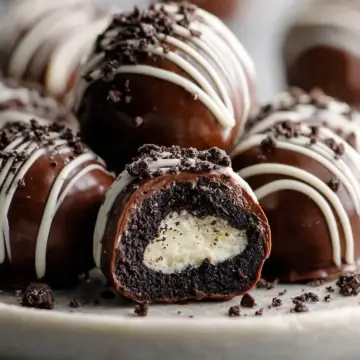
- 25 Oreo cookies: The star of the show! These iconic cookies provide the chocolatey goodness and crunch that make these truffles irresistible.
- 4 oz cream cheese, softened: This is what makes the truffles decadently smooth and creamy. For best results, ensure it's at room temperature, so it combines effortlessly with the Oreos.
- 1 cup melted chocolate: Choose your favorite—whether it’s white, milk, or dark chocolate. Each type lends a unique touch to the flavor profile of your truffles.
- Optional toppings: Consider adding some fun with sprinkles or crushed Oreos to your truffles. This not only enhances the appearance but also packs in extra flavor and texture.
With these ingredients, you're well on your way to crafting a dessert that will impress your friends and satisfy your sweet tooth! For more tips, take a look at reputable sources on baking basics like King Arthur Baking. Happy creating!
Step-by-Step Preparation of No-Bake Oreo Truffles
Making No-Bake Oreo Truffles is a delightful adventure that only requires a handful of ingredients and a touch of your culinary creativity! Let’s break it down step-by-step to make this creamy, irresistible dessert that will leave your friends and family craving more.
Gather Your Ingredients
Before diving into this sweet kitchen project, ensure you have everything you need at your fingertips. For these delicious truffles, you will need:
- 25 Oreo cookies
- 4 oz cream cheese (softened)
- 1 cup of melted chocolate (choose between white, milk, or dark based on your preference)
- Optional toppings: think sprinkles, crushed Oreos, or chopped nuts for that extra flair!
Having your ingredients ready not only saves time but also creates a smoother preparation experience.
Crush the Oreo Cookies
Now, let’s get to the fun part! Use a food processor to crush your Oreo cookies into fine crumbs. You want them to be almost like a powder—just sticky enough to bind well with the cream cheese. If you don’t have a food processor, placing them in a zip-top bag and using a rolling pin works too. This is a great way to relieve some stress, don’t you think?
Mix in the Cream Cheese
Once your cookies are crushed, add the softened cream cheese. This is where the magic happens! Blend the two together until the mixture is smooth and fully combined. The cream cheese adds richness, making your No-Bake Oreo Truffles super creamy. A hand mixer works wonders here; it’s quick and efficient.
Roll Into Truffle Balls
Scoop out the cookie-cream cheese mixture and roll it into small, even-sized balls, about 1 inch in diameter. Place these on a lined baking tray. Easy peasy! This step is perfect for getting everyone involved. Invite your friends or family to join the fun; who doesn't love a little hands-on activity?
Chill the Truffle Balls
To help the balls hold their shape while coating, pop them in the refrigerator for about 15 minutes. This also firms up the mixture, making the next steps a breeze.
Melt the Chocolate
While your truffle balls are chilling, it’s time to melt your chocolate. Use a microwave-safe bowl and heat it gently, stirring until it’s smooth. You want the chocolate to be silky for that perfect coating, so take your time with this step.
Dip and Decorate the Truffles
Now comes the most gratifying part: dipping! Take each chilled ball and coat it fully in your melted chocolate. Allow any excess chocolate to drip off before placing it back on the tray. For an extra touch, add optional toppings like crushed Oreos or sprinkles while the chocolate is still wet. The final presentation makes all the difference!
Once the chocolate has set, indulge in these delightful No-Bake Oreo Truffles. You’ll be amazed at how easy yet satisfying this dessert is to prepare. Enjoy sharing them with friends or family, or keep them all to yourself—no judgment here!
Ready to sweeten your day? Check out more about easy dessert ideas on The Spruce Eats for inspiration!
Variations on No-Bake Oreo Truffles
No-Bake Oreo Truffles are already a fantastic treat, but there are plenty of ways to personalize and elevate your creations.
Different chocolate coatings
While milk chocolate is a classic choice, why not experiment? Try coating your truffles in:
- White chocolate for a sweeter, creamier bite
- Dark chocolate for a rich, slightly bitter contrast
- Baking chocolate for a more intense flavor
You can even mix flavors—for instance, create half milk and half white chocolate layers for a marbled effect!
Creative toppings to try
Toppings can truly make your No-Bake Oreo Truffles shine. Consider adding:
- Crushed Oreos for extra crunch and visual appeal
- Chopped nuts for a nutty flavor and protein boost
- Sprinkles to match any party theme
- Shredded coconut for a tropical twist
Stuck in a dessert rut? Adding these simple variations can turn your truffles into a conversation starter! Get inspired by this comprehensive collection of ideas from Bon Appétit.
Cooking Tips and Notes for No-Bake Oreo Truffles
Tips for Getting the Perfect Consistency
Achieving the ideal texture for your No-Bake Oreo Truffles is key to their deliciousness. Here are a few practical tips to guide you:
- Crush Oreos Finely: Use a food processor to get your cookies into fine crumbs. This will help achieve a smooth and cohesive mixture and prevent any chunky bits in the truffles.
- Softened Cream Cheese: Ensure your cream cheese is at room temperature. This will blend more easily with the crumbs for an ultra-smooth filling.
- Chill Before Dipping: Let your truffle balls chill for about 15 minutes. This helps them hold their shape while you dip them into melted chocolate.
- Choose Your Chocolate Wisely: Dark chocolate provides a great balance to the sweetness, while white chocolate enhances it. Experiment and see what you prefer!
For more inspiration, you may find expert tips on making truffles at Epicurious. Happy cooking!
Serving Suggestions for No-Bake Oreo Truffles
Ways to Present Your Truffles
When it comes to serving your No-Bake Oreo Truffles, presentation can make all the difference. Here are some delightful ideas to elevate your dessert:
- Elegant Platters: Arrange the truffles on a tiered cake stand or a decorative platter for a touch of sophistication.
- Chocolate Dipping Station: Set up a DIY dipping station with different chocolate types and toppings like sprinkles, crushed nuts, or coconut flakes for your guests to customize their treats.
- Gift-Worthy Packaging: Package truffles in clear treat bags with ribbons or in small boxes, making them perfect for gifting. This not only looks great but adds a personal touch.
- Seasonal Decor: Consider seasonal themes—pastel colors for spring or rich reds and greens for the holidays—adding a festive feel to your dessert table.
With these fun serving suggestions, your No-Bake Oreo Truffles will be the stars of any gathering!
Time Breakdown for No-Bake Oreo Truffles
Preparation time
Making your No-Bake Oreo Truffles is a breeze! All you need is about 15 minutes to prepare the ingredients and mix them into a creamy, cookie-crumble blend.
Chilling time
After rolling them into delightful balls, let your truffles chill in the refrigerator for 15 minutes. This step is crucial for those perfectly firm truffles that hold their shape while being dipped in luscious melted chocolate.
Total time
In just 30 minutes, you can whip up a batch of irresistible No-Bake Oreo Truffles. This quick and enjoyable process means you’ll have a delicious dessert ready in no time, ideal for last-minute gatherings or cozy nights in.
If you’re looking for more time-saving recipes, check out resources like Food Network or AllRecipes. Happy cooking!
Nutritional Facts for No-Bake Oreo Truffles
When indulging in No-Bake Oreo Truffles, it's important to know what you're savoring. Each truffle packs about 60 calories, making it a delightfully sweet treat that you can enjoy in moderation.
- Sugar content: With approximately 8 grams of sugar, these truffles offer a satisfying sweetness that can quell your dessert cravings.
- Protein: Though not a protein powerhouse, each truffle provides around 1 gram of protein, thanks to the cream cheese.
Feel free to check out Nutritional Medline Plus for more insights on dessert ingredients! Enjoy these creamy bites guilt-free, knowing they bring a little joy to your day.
FAQs about No-Bake Oreo Truffles
Can I use gluten-free Oreos for this recipe?
Absolutely! You can substitute regular Oreos with gluten-free Oreos to make these delightful no-bake Oreo truffles suitable for those with gluten sensitivity. Just make sure to double-check the packaging to ensure all ingredients meet your needs.
How long do these truffles last?
Once prepared, these no-bake Oreo truffles can last in the refrigerator for about 1 week. Just store them in an airtight container to keep them fresh and maintain their creamy texture. If you're like me and want to savor them longer, consider making a double batch!
Can I freeze the truffles?
Yes, you can definitely freeze your truffles! Simply place them in an airtight container or freeze them in a single layer before transferring to a container. They can last for up to 3 months in the freezer, making them a perfect make-ahead treat for a busy week or an impromptu get-together! When you’re ready to enjoy, thaw them in the fridge for a few hours.
For more tips on storage and ingredient substitutes, check out this gluten-free baking guide for further insights.
Conclusion on No-Bake Oreo Truffles
After trying these delightful No-Bake Oreo Truffles, you'll understand why they are a crowd favorite. Simple to make and irresistibly creamy, these truffles are perfect for any occasion—even as a sweet treat after a long day. Don't forget to share them with friends; they'll love you for it! Want more dessert inspiration? Check out our favorite dessert recipes.
No-Bake Oreo Truffles: Easy, Creamy, Irresistible Dessert
Equipment
- Food processor
- Mixing Bowl
- tray
Ingredients
Base Ingredients
- 25 cookies Oreo cookies Crushed
- 4 oz cream cheese Softened
- 1 cup melted chocolate White, milk, or dark
- optional toppings Sprinkles or crushed Oreos
Instructions
Making Oreo Truffles
- Crush Oreo cookies into very fine crumbs using a food processor until slightly sticky.
- Add softened cream cheese and mix until smooth and fully combined.
- Scoop mixture and roll into evenly sized balls. Place on a lined tray.
- Chill the truffle balls for about 15 minutes until firm.
- Melt chocolate gently, stirring until smooth.
- Dip each ball into melted chocolate, coat fully, and let excess drip off.
- Place coated truffles on tray and add toppings while chocolate is still wet.
- Let chocolate set at room temperature or chill briefly until firm.


Leave a Reply