
Introduction to Slice and Bake Cookies
Slice and bake cookies offer an effortless yet delightful twist to your baking routine. These cookies are unique because they can be made ahead of time, saving you from last-minute baking frenzies. Picture this: you have visits planned or an unexpected craving for something sweet. Simply pull a log of dough from the freezer, slice, and bake!
What Makes Slice and Bake Cookies So Special?
One of the standout features of slice and bake cookies is their versatility. You can customize them with various mix-ins like chocolate chips, dried fruits, or colorful sprinkles, allowing you to cater to various tastes. The combination of convenience and creativity makes them perfect for any occasion, from casual gatherings to festive celebrations.
Additionally, the chilling process gives the dough a chance to develop deeper flavors and a better texture, making the end result wonderfully satisfying. Plus, there's something undeniably satisfying about watching those perfectly uniform cookies emerge from the oven.
For an even more in-depth experience, check out our video tutorial just below the recipe. You'll see firsthand how simple it is to whip up a batch of delicious slice and bake cookies that will impress friends and family alike. So, let's dive into our scrumptious recipe!

Ingredients for Slice and Bake Cookies
Essential ingredients for a perfect batch
Creating delicious slice and bake cookies is not just easy—it's also super fun! The right ingredients can make all the difference, so let's dive into what you'll need for a splendid batch.
- Butter: Using unsalted butter (1 cup) ensures you control the salt levels in your cookies. It adds that rich flavor we all love.
- Sugars: A combination of granulated sugar (½ cup) and light brown sugar (¼ cup) gives your cookies a perfect sweetness and delightful chewiness.
- Egg Yolk: Just 1 large egg yolk helps bind the ingredients together, adding richness to the dough.
- Salt & Extracts: A pinch of salt (½ teaspoon) enhances flavor, while vanilla extract (1 teaspoon) and optional almond extract (½ teaspoon) elevate the aroma. If you love sprinkles, add nonpareils (2 ½ tablespoons) to brighten each bite.
- Flour: The base of your dough is all-purpose flour (2 ¼ cups), creating the right texture for slicing and baking.
Gather these essentials, and you'll be on your way to a batch of slice and bake cookies that everyone will love! For more on these ingredients, check out The Science of Baking for deeper insights.
Step-by-Step Preparation of Slice and Bake Cookies
Preparing slice and bake cookies at home is not only a rewarding experience but also a fun way to express your creativity in the kitchen. Here’s how you can make these delightful treats step by step!
Gather Your Tools and Ingredients
Before diving into the mixing bowl, make sure you have everything you need. Here’s what to collect:
- Ingredients: Unsalted butter, sugar, light brown sugar, an egg yolk, salt, vanilla extract, almond extract (if desired), all-purpose flour, and colorful nonpareils (optional).
- Tools: You’ll need a mixing bowl, electric mixer or whisk, a sharp knife, and a baking sheet lined with parchment paper. A set of measuring cups and spoons will also come in handy.
Cream Together Butter and Sugars
Begin by placing your softened butter and both types of sugar in a large bowl. Using an electric mixer, cream them together until the mixture is light and fluffy. This step is crucial; it ensures your cookies will have a lovely texture.
Mix in Egg Yolk, Salt, and Extracts
Once your butter and sugars are well-combined, it’s time to add the egg yolk, salt, and your choice of extracts. Beat the mixture until everything is well incorporated. The addition of vanilla and almond extracts adds a lovely depth of flavor to your slice and bake cookies.
Incorporate Flour and Nonpareils
Next, gradually add your flour to the mixture while the mixer is on low speed. This helps to prevent a flour dust cloud in your kitchen! If the dough feels crumbly, use a spatula to scrape down the sides of the bowl and work the flour in. Once incorporated, fold in the nonpareils carefully to retain their vibrant colors.
Shape and Chill the Dough Logs
Divide your dough into two equal parts and transfer each onto a sheet of wax paper. Shape each piece into a log that is about 2 inches wide. Wrap them up tightly using the wax paper, and place in the refrigerator to chill for at least 2 to 3 hours. For perfectly round cookies, wrapping the dough in a paper towel roll can be a game changer!
Preheat the Oven and Prepare the Baking Sheet
After the dough has chilled, preheat your oven to 350ºF (175ºC). Line your baking sheet with parchment paper to prevent sticking.
Slice the Logs and Bake
Remove a dough log from the fridge and use a sharp knife to cut it into ¼ inch slices. Arrange the slices on the lined baking sheet, leaving about an inch of space between them. Bake for 10 to 12 minutes, or until the edges just start turning golden brown. Let the cookies cool on the baking sheet before enjoying.
With this guide, you’re well on your way to serving up a batch of scrumptious slice and bake cookies to impress friends and family! For more tips and tricks on decorations, check out this resource, and enjoy experimenting in the kitchen!
Variations on Slice and Bake Cookies
Transform your slice and bake cookies with these delightful variations that bring a touch of creativity to your baking!
Colorful Nonpareils Twist
For a vibrant twist, toss in colorful nonpareils before chilling the dough. These little sprinkles not only add a fun look but also a delightful crunch. If you're a fan of festive cookies, this is the perfect way to elevate your regular recipe. You can find diverse nonpareils at specialty baking stores or online, making it easy to customize for any season or occasion.
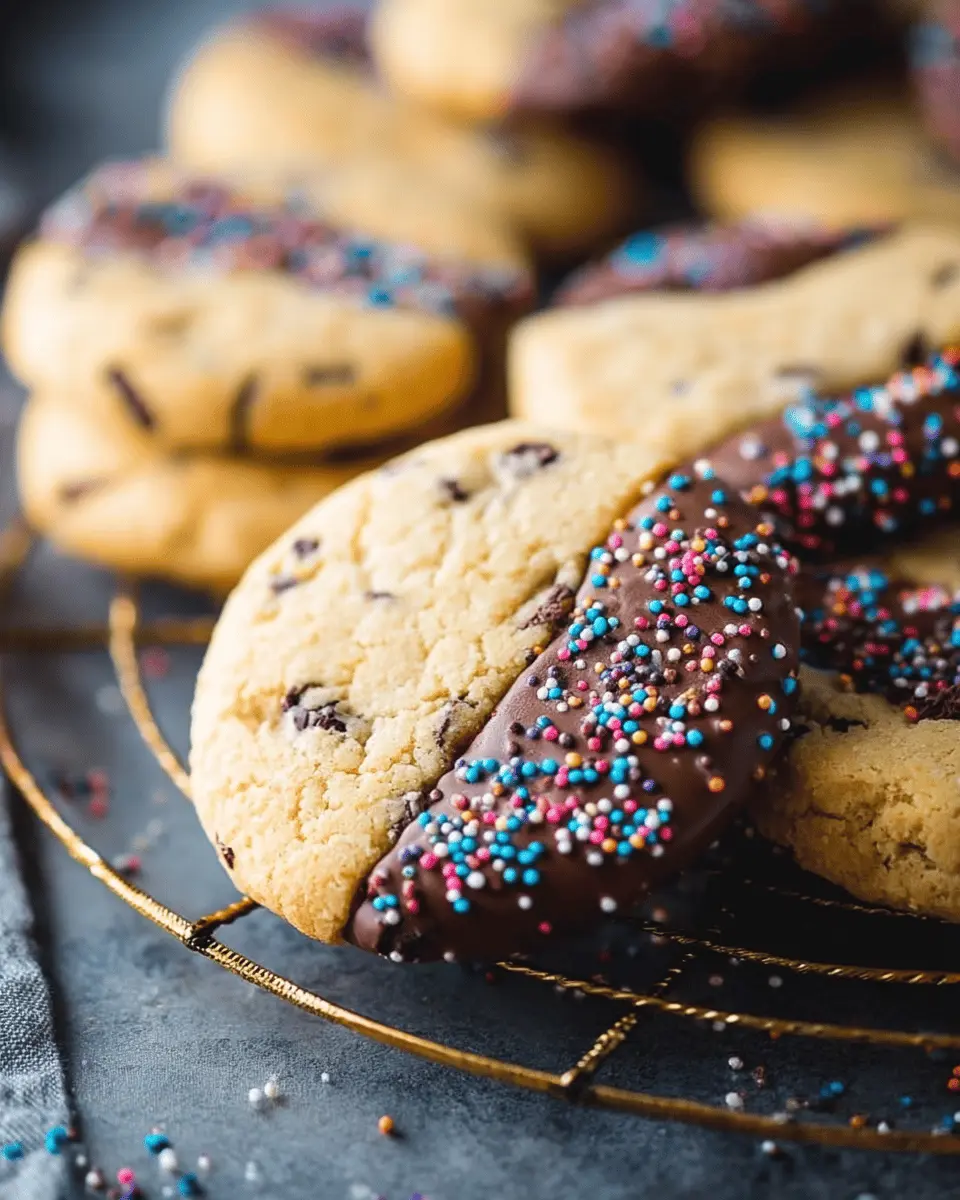
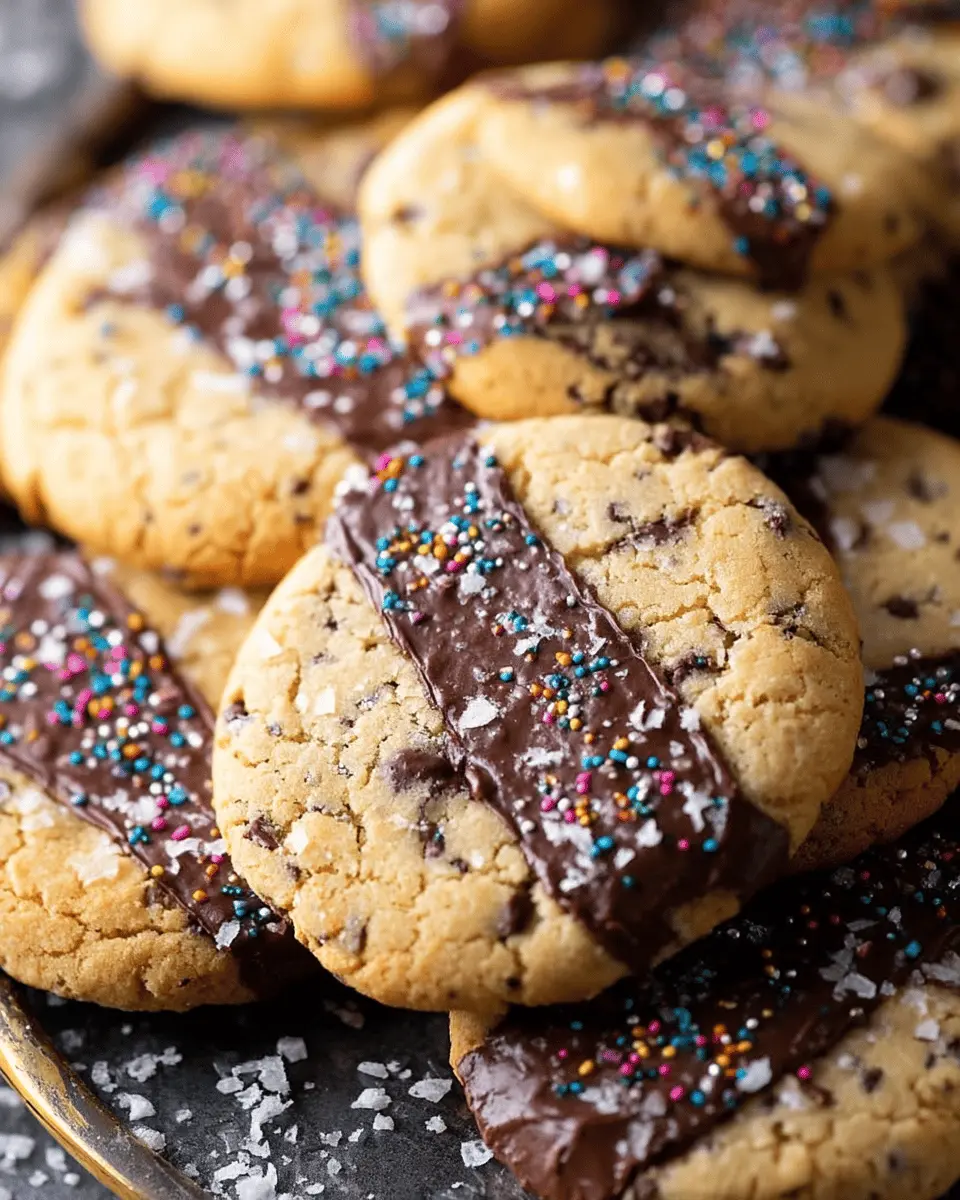
Chocolate-Dipped Slice and Bake Cookies
Take your cookies to the next level by dipping them in melted chocolate after they’ve cooled. Simply use good quality chocolate—milk, dark, or white—melted until smooth. Then, dip half of each cookie and set them to cool on parchment paper. This indulgent addition not only enhances flavor but also creates a beautiful finish. Want to learn more about chocolate dipping? Check out this insightful chocolate melting tutorial for tips!
Baking Tips and Notes for Slice and Bake Cookies
Key Tips for Flawless Cookies
Creating delicious slice and bake cookies is easier than you think! Here are some valuable tips to ensure every batch turns out perfectly:
-
Chill Time is Key: Allow the dough to chill for the full 2–3 hours. This firms it up, making slicing easier and helping maintain shape during baking.
-
Uniform Slices: Aim for even thickness when slicing. This ensures all cookies bake uniformly. A steady hand or a sharp knife makes a difference!
-
Experiment with Flavors: Feel free to incorporate different extracts or even mix-ins like nuts or chocolate chips to personalize your cookies.
To dive deeper into cookie-making techniques, check out Serious Eats’ guide on cookie science, which explores the art of baking delightful treats. Enjoy baking!
Serving Suggestions for Slice and Bake Cookies
Creative Ways to Present Your Cookies
When it comes to slice and bake cookies, presentation can elevate their appeal! Here are some fun and creative ideas to make your cookies stand out:
- Cookie Platters: Arrange your cookies on a vibrant platter or tiered stand. Mixing colors and shapes makes for a delightful display.
- Gift Boxes: Package individual cookies in decorative boxes or tins with a personal note. Perfect for gifting during the holidays or as a sweet surprise!
- Themed Parties: Match your cookie decor to party themes. For a birthday bash, use sprinkles in the party colors or even edible glitter for added flair.
- Serve with Dips: Pair your cookies with small bowls of chocolate, caramel, or fruit dips. This adds an interactive element for guests.
By thinking outside the cookie box, you can create a memorable experience that highlights your delicious slice and bake cookies in a way that's uniquely you! For additional inspiration, check out this guide on cookie presentation.
Time Breakdown for Slice and Bake Cookies
Understanding the timing for your slice and bake cookies will ensure a smooth baking experience. Here’s how it breaks down:
Preparation Time
Set aside about 15 minutes to combine your ingredients and prepare the dough.
Chilling Time
You'll need to chill the dough for at least 2 hours. This step is crucial for creating that perfect texture and shape when baking.
Baking Time
Once chilled, bake your cookies for 10-12 minutes. You'll want to watch for a golden edge to tell when they’re perfectly done.
Now that you know the time commitment, you're ready to get started on these delicious treats! For more tips on perfecting your cookies, check out this guide on cookie baking techniques.
Nutritional Facts for Slice and Bake Cookies
Calories per cookie
Each of these delightful slice and bake cookies packs about 114 calories. That’s a reasonable treat when you're craving something sweet! If you're looking to enjoy them while keeping tabs on your daily intake, just remember that moderation is key.
Key nutrients
These cookies offer more than just sweetness! Here’s a quick breakdown of their key nutrients:
- Carbohydrates: 13g
- Protein: 1g
- Fat: 7g (with 4g being saturated)
- Cholesterol: 22mg
- Sodium: 40mg
Whether you’re enjoying them as a snack or a dessert, they provide energy while also containing some essential nutrients. If you're curious about the nutrition label specifics, this resource offers more details on food composition! Enjoy your baking!
FAQs about Slice and Bake Cookies
Can I freeze the cookie dough?
Absolutely! Slice and bake cookie dough freezes wonderfully. Simply wrap the shaped logs tightly in plastic wrap or aluminum foil and place them in a freezer bag. They can be stored for up to three months. When you're ready to indulge, just slice the frozen logs and bake them straight from the freezer—there's no need to thaw!
How do I store leftover cookies?
To keep your slice and bake cookies fresh, store them in an airtight container at room temperature. You can use wax paper between layers if you’re stacking them, which helps prevent sticking. They should stay good for about a week, but let’s be honest—you’ll probably eat them all long before that!
What's the best way to customize these cookies?
Customization is key! Add your favorite nuts, chocolate chips, or dried fruit to the dough for a unique twist. Want to explore more flavors? Try out different extracts like peppermint or orange. The options are endless, and you can even create a fun color scheme with different types of sprinkles or food coloring!
Conclusion on Slice and Bake Cookies
In summary, slice and bake cookies are an easy and delightful treat that anyone can whip up. With a little bit of prep time and some chilling, you can create a batch of gorgeous cookies that are perfect for any occasion. Don’t forget to explore the option of dipping them in chocolate for even more fun!

Slice and Bake Cookies
Equipment
- electric mixer
- cookie sheet
- parchment paper
- wax paper
- sharp knife
Ingredients
- 1 cup unsalted butter softened
- ½ cup sugar
- ¼ cup light brown sugar tightly packed
- 1 large egg yolk
- ½ teaspoon salt
- 1 teaspoon vanilla extract
- ½ teaspoon almond extract optional
- 2 ¼ cups all-purpose flour
- 2 ½ Tablespoons colorful Nonpareils optional
Instructions
- Combine butter and sugars in a large bowl (or in the bowl of a stand mixer) and use an electric mixer to beat until creamy.
- Add egg yolk and stir well.
- Add salt, vanilla extract, and almond extract (if using). Beat until well-combined.
- With mixer on low speed, gradually add flour until completely combined. Dough may be crumbly.
- Add nonpareils (if using) and fold into dough.
- Divide dough into 2 parts and transfer each part onto a sheet of wax paper. Work dough into a 2" wide log shape.
- Transfer to the refrigerator to chill for at least 2-3 hours.
- Once dough has chilled, preheat oven to 350ºF (175ºC) and line a cookie sheet with parchment paper.
- Remove one cookie dough log from the refrigerator and use a sharp knife to cut into ¼" slices.
- Place slices on prepared cookie sheet about 1" apart and bake for 10-12 minutes or until edges are just beginning to turn golden brown.
- Allow to cool on baking sheet before serving. If desired, dip cooled cookies in chocolate and top with additional sprinkles.


Leave a Reply