
Introduction to Pink Velvet Cake
When you’re looking to impress your friends or spruce up a casual gathering, pink velvet cake is a fantastic choice for homemade treats. Not only does this striking cake bring a pop of color to the table, but its velvety texture and light, buttery flavor make it irresistibly delicious. Imagine the delighted faces of your loved ones as they slice into this masterpiece, revealing its gorgeous, rosy interior.
Why choose pink velvet cake over the usual chocolate or vanilla? This cake stands out with its unique combination of flavors that blend seamlessly into a rich, moist bite. It’s perfect for celebrations like birthdays, anniversaries, or even a cozy coffee catch-up. Plus, making it from scratch can be a rewarding adventure! According to Serious Eats, using high-quality ingredients and taking the time to follow methodical techniques can elevate your baking game.
In a world where you can find cupcakes and cakes at every corner bakery, creating a pink velvet cake at home lets you add a personal touch that is always appreciated. So, roll up your sleeves and let’s dive into this delicious recipe that is bound to become a favorite in your household!
Ingredients for Pink Velvet Cake
Creating the perfect pink velvet cake starts with choosing quality ingredients. Here are the essentials you’ll need to bring that luscious, velvety texture and beautiful color to life.
Essential Ingredients for the Cake
- 13 oz cake flour: This fine flour gives your cake its tender crumb.
- 12 oz granulated sugar: Sweetens the cake while contributing to its fluffy structure.
- 1 teaspoon salt: Enhances flavor and balances sweetness.
- 1 tablespoon baking powder: Helps the cake rise to perfection.
- ½ teaspoon baking soda: Reacts with acidity to create leavening.
- 5 oz egg whites: Adds moisture and structure. Make sure they’re at room temperature!
- 4 oz vegetable oil: Keeps the cake moist.
- 10 oz buttermilk: Adds tang and richness—room temp is key!
- 6 oz unsalted butter: Provides flavor and fat for richness.
- 2 teaspoons vanilla: A must for that classic cake flavor.
- 2 drops electric pink food coloring: To give it that signature pink hue.
Ingredients for Stabilized Whipped Cream
Top your cake with a luscious, stabilized whipped cream to keep everything beautifully intact! You’ll need:
- 24 ounces heavy whipping cream: The star of the show for whipped cream.
- 4 ounces powdered sugar: Sweetens and adds a touch of smoothness.
- 2 teaspoons powdered gelatin: Key for stabilization, keeping your cream fluffy.
- 1 tablespoon cold water: To bloom the gelatin.
- 1 teaspoon vanilla extract: For added flavor.
- 1 teaspoon heavy whipping cream: Helps incorporate the gelatin smoothly.
- 1 cup fresh raspberries (optional): A delightful garnish that adds a splash of color and flavor.
With these ingredients in hand, you're well on your way to baking an unforgettable pink velvet cake! If you're looking for more tips and tricks, check out Baking Tips for Beginners.
Preparing Pink Velvet Cake
Making a stunning pink velvet cake isn't just a treat for the taste buds; it's a feast for the eyes, too. With its rich color and light texture, it’s perfect for any celebration. Here's how to prepare this delightful cake step by step.
Gather and measure ingredients
Before diving into mixing, it’s important to ensure that you have all your ingredients within reach. For the pink velvet cake, you will need:
- 13 oz cake flour
- 12 oz granulated sugar
- 1 teaspoon salt
- 1 tablespoon baking powder
- ½ teaspoon baking soda
- 5 oz egg whites (room temperature)
- 4 oz vegetable oil
- 10 oz buttermilk (room temperature)
- 6 oz unsalted butter (softened)
- 2 teaspoons vanilla
- 2 drops electric pink food coloring
For the stabilized whipped cream:
- 24 oz heavy whipping cream
- 4 oz powdered sugar
- 2 teaspoons powdered gelatin
- 1 tablespoon cold water
- 1 teaspoon vanilla extract
- Fresh raspberries (for garnish, optional)
Ensure you measure ingredients by weight for accuracy—this makes a huge difference in your final cake!
Preheat the oven
For optimal baking, preheat your oven to 335º F (or 350º F). Lower temperatures prevent the outside from darkening before the inside is baked through, ensuring moist cake layers.
Prepare the cake pans
Prepare three 6"x2" cake pans by greasing them with your choice of a baking spray or cake goop. This will help the cake layers release smoothly once baked. Fill each pan about ¾ full of batter to prevent overflow.
Mix the dry ingredients
In the bowl of a stand mixer equipped with a paddle attachment, combine the cake flour, granulated sugar, baking powder, baking soda, and salt. Mix for about 10 seconds just to blend the dry ingredients evenly.
Combine wet ingredients and create the batter
In a separate bowl, mix ½ cup of the buttermilk with the vegetable oil, setting it aside. In another bowl, whisk the remaining buttermilk, egg whites, pink food coloring, and vanilla together.
Next, add the softened butter to the dry mix and blend it on low speed until it resembles coarse sand. This step is essential for building a nice structure in your cake.
Add the milk-oil mixture and mix until moistened, then increase to medium speed for about 2 full minutes. This is crucial for a fluffy texture—don’t skip this!
Gradually mix in the egg white mixture in three parts, blending for 15 seconds each time. Once fully combined, pour the batter into your prepared pans.
Bake the cake layers
Bake for 35-40 minutes, or until a toothpick inserted into the center comes out clean. Remember to tap the pans firmly on the counter immediately post-baking to release steam.
Cool and remove from pans
Let the cakes cool in the pans for 10 minutes, then flip them onto a cooling rack. If you want even moister layers, wrap them in plastic after cooling and freeze them before frosting.
Make the stabilized whipped cream
To stabilize your whipped cream, start by blooming gelatin in cold water for 5 minutes, then melt it in the microwave. In a separate bowl, whip heavy cream to soft peaks, then blend in powdered sugar and vanilla. Drizzle in the melted gelatin until stiff peaks form—be careful not to overmix!
Frost the cake
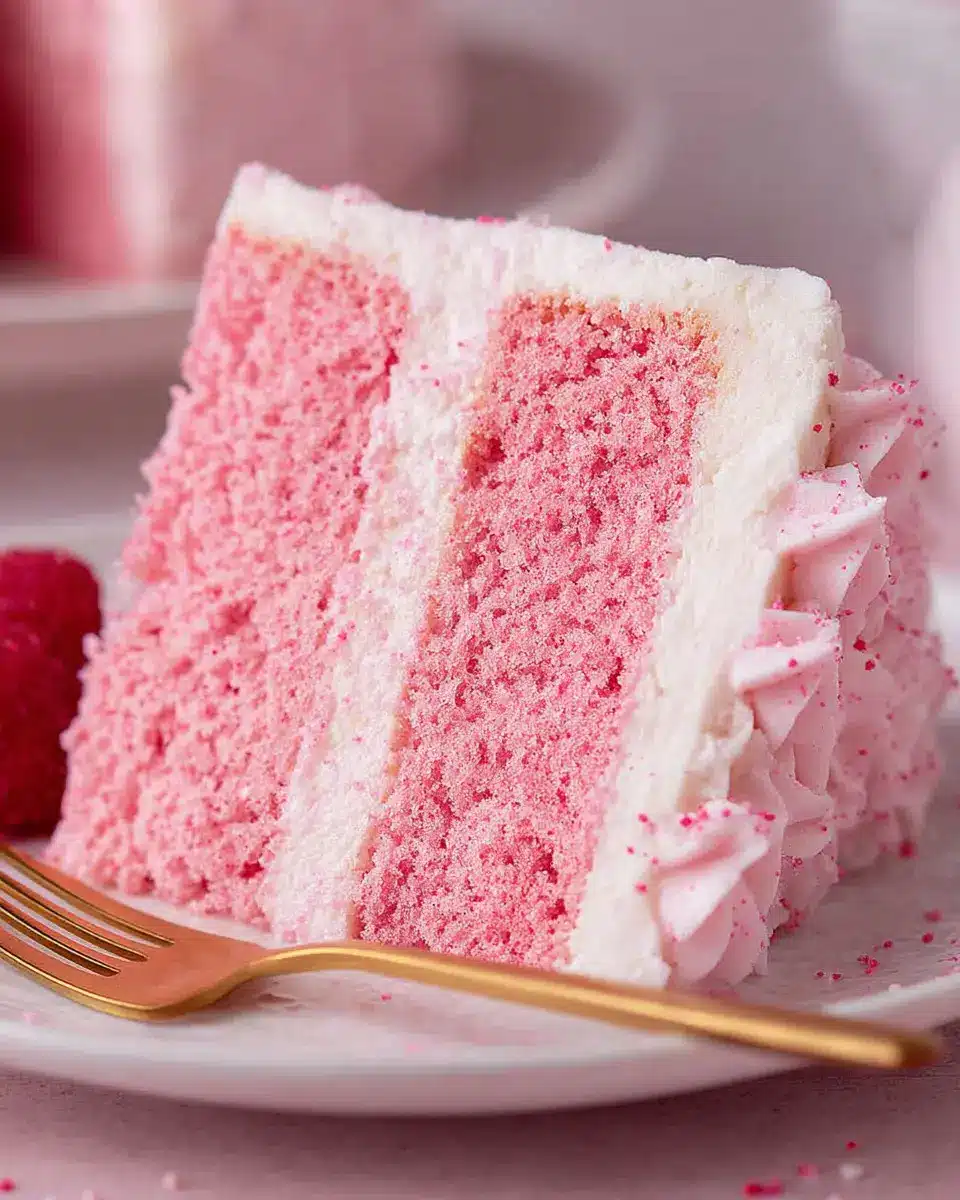
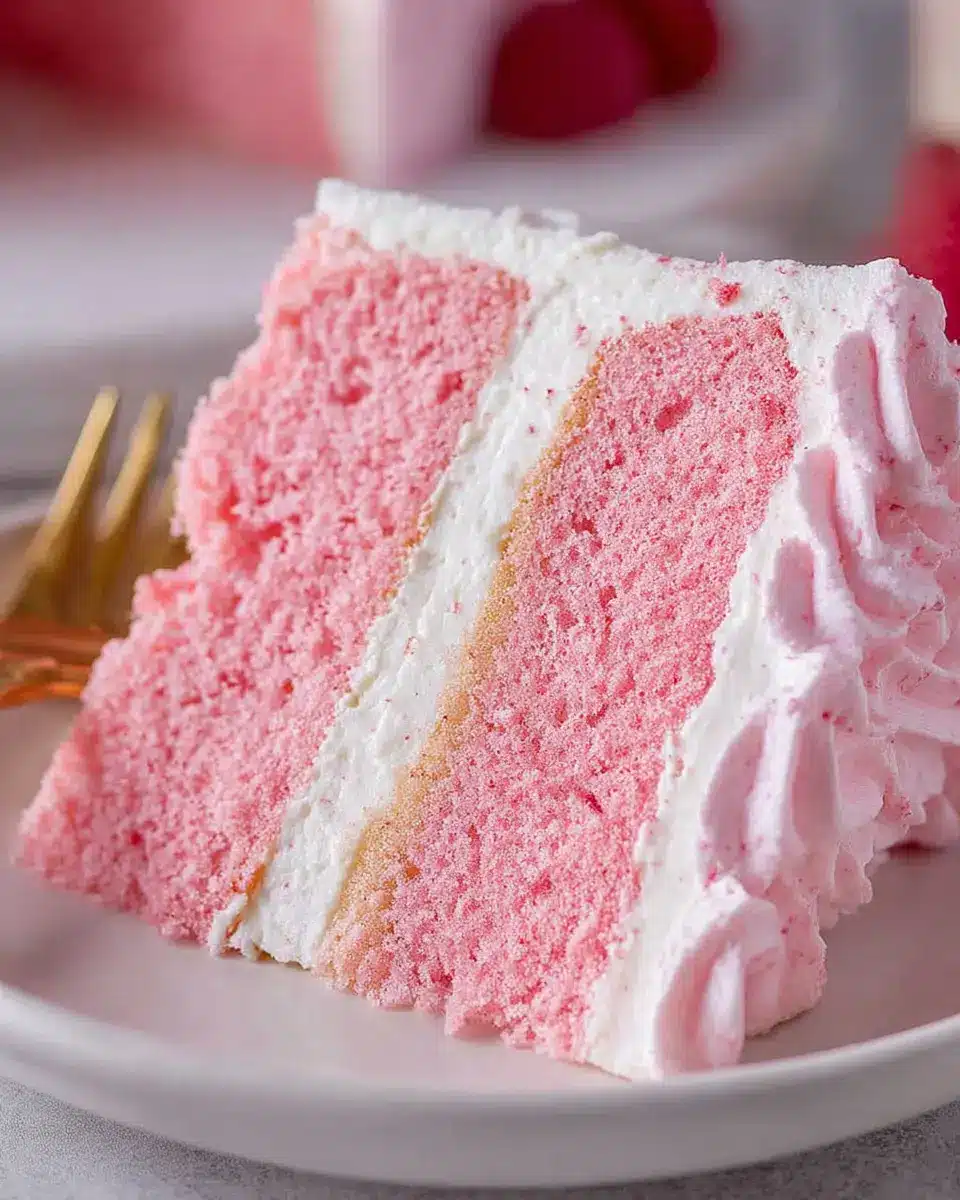
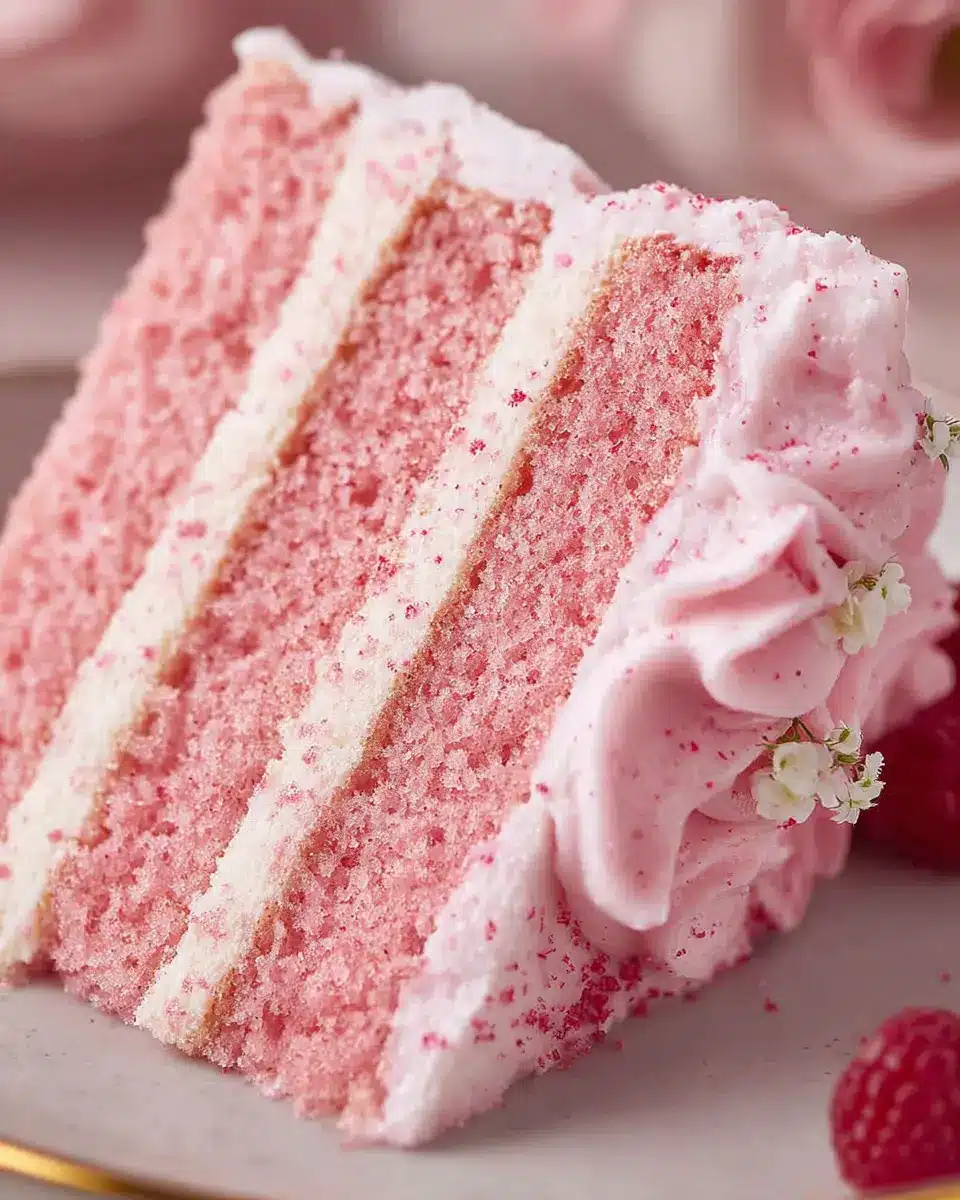
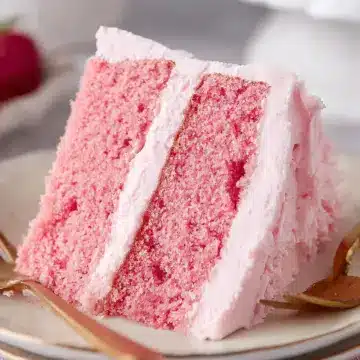
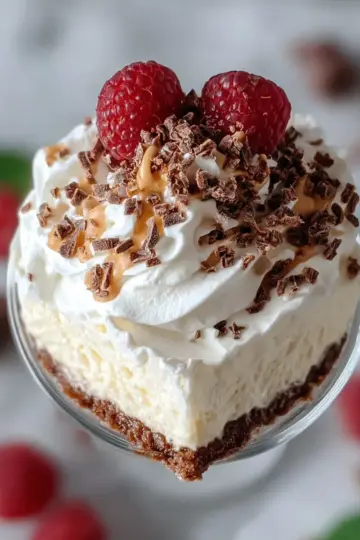
Once your pink velvet cake layers are completely cooled, it’s time to assemble! Layer the whipped cream between the cake layers and on top, ensuring an even spread. For a delightful touch, add fresh raspberries on top for garnish.
And there you have it—your gorgeous pink velvet cake is ready to impress! Whether it's for a birthday, anniversary, or simply just because, this recipe is sure to bring joy to your celebrations.
For more delicious cake recipes and tips, check out Baker's Journal or explore the world of baking at King Arthur Baking.
Variations of Pink Velvet Cake
Pink Velvet Cake with Cream Cheese Frosting
Elevate your pink velvet cake experience by pairing it with dreamy cream cheese frosting. The tanginess of the cream cheese perfectly complements the sweetness of the cake, creating a delightful balance. For an added twist, consider folding in raspberry puree to infuse fruity flavor. This variation is perfect for celebrations, as it adds a touch of sophistication and elegance to your dessert table.
Chocolate Variation of Pink Velvet Cake
If you love chocolate, try a chocolate pink velvet cake! Simply mix in cocoa powder for a rich, decadent flavor while maintaining that signature pink hue. The chocolate enhances the cake’s moisture and adds complexity, making it a fantastic choice for chocolate lovers. Top it with a silky chocolate ganache for the ultimate indulgence!
Explore more cake variations on Baking Bliss for endless inspiration!
Baking notes for Pink Velvet Cake
Tips for preventing cake from collapsing
Preventing your pink velvet cake from collapsing is all about balance. Ensure you’re mixing your batter thoroughly during crucial stages, particularly when incorporating the dry ingredients and wet mixtures. Not mixing enough can lead to a weak structure that just can’t support the cake's height. Also, make sure to tap your pans on the counter immediately after baking; this releases steam and prevents the cake from shrinking.
Importance of ingredient temperature
Using ingredients at the right temperature is essential for the perfect pink velvet cake. Keeping your egg whites and buttermilk at room temperature allows for proper emulsification, leading to a more stable batter. Room-temperature ingredients blend seamlessly, ensuring your cake rises beautifully and remains fluffy. If you’re in a hurry, a warm water bath can help quickly warm your buttermilk.
For more expert cake-baking tips, check out The Kitchn for comprehensive baking advice!
Serving suggestions for Pink Velvet Cake
Garnishing with fresh raspberries
Elevate your pink velvet cake by garnishing it with fresh raspberries. Their sweet-tart flavor beautifully contrasts the cake's richness, making each bite a delightful experience. Simply scatter a handful on top, or create a decorative border around the edges. For an extra touch, consider a light dusting of powdered sugar over the raspberries to enhance their bright color. If you're feeling adventurous, try pairing the raspberries with a mint leaf to add a pop of freshness!
Pairing with a homemade beverage
Complete your pink velvet cake experience with a refreshing homemade beverage. A vibrant lemonade infused with basil or mint adds a delightful twist that complements the cake's buttery notes. Alternatively, consider a berry-infused iced tea. Simply steep your favorite tea and add fresh berries for a colorful and tasty option that echoes the cake's aesthetic. These beverages are not only delicious but also elevate your dessert experience to new heights! For more inspiration, check out this homemade lemonade recipe to get started.
Time details for Pink Velvet Cake
Preparation time
Get ready to dive into baking with a preparation time of about 25 minutes. Gather your ingredients, ensure everything is at room temperature, and you’ll be well on your way to creating this delightful pink velvet cake.
Baking time
Baking will take approximately 35 to 40 minutes. Keep an eye on your cakes; they’re perfectly done when a toothpick inserted into the center comes out clean.
Total time
From start to finish, set aside about 1 hour and 15 minutes to make your pink velvet cake, including cooling time. Patience pays off—trust us, that first slice will be worth it!
For more tips on baking cakes perfectly, check out resources like Serious Eats. Happy baking!
Nutritional Information for Pink Velvet Cake
When you're indulging in a slice of pink velvet cake, it's good to be mindful of what you're treating yourself to. Here’s a quick look at the nutritional breakdown:
Calories
One slice of pink velvet cake contains approximately 320 calories, making it a delightful yet decadent choice for dessert lovers.
Fat Content
This cake packs about 15 grams of fat per slice, mainly from butter and oil, contributing to its rich flavor and moist texture.
Sugar Content
Expect around 22 grams of sugar in each serving, creating that sought-after sweetness that brings the cake to life.
Feeling inspired? You can explore more about healthy baking alternatives or frosting variations for your pink velvet cake on sources like Healthline and The Spruce Eats. Enjoy experimenting in the kitchen!
FAQs about Pink Velvet Cake
What is the difference between red velvet and pink velvet cake?
The primary difference between red velvet and pink velvet cake lies in their coloring and flavor profiles. Red velvet cake is typically enriched with cocoa powder and has a rich, slightly chocolatey taste, often enhanced with cream cheese frosting. In contrast, pink velvet cake is a lighter variation that focuses on the airy texture and is colored with a few drops of electric pink food coloring, creating a subtle sweetness. It’s often paired with whipped cream or fruit toppings for a fresh twist.
Can I use regular cream in place of stabilized whipped cream?
While you can use regular cream, stabilized whipped cream holds its shape better, making it ideal for frosting or decorating a pink velvet cake. Without stabilization, the cream may wilt or lose its structure over time, especially in warmer conditions. If you're short on time, consider adding a little powdered sugar and beating it to soft peaks for a quick, albeit less stable, alternative.
How can I store leftover cake?
To store leftover pink velvet cake, wrap it tightly in plastic wrap or place it in an airtight container. This helps retain moisture and flavor. You can store it in the refrigerator for up to 5 days, or freeze individual slices for up to 2 months. Just be sure to let it thaw at room temperature when you're ready to enjoy another slice! For more storage tips, check out this expert guide.
Conclusion on Pink Velvet Cake
In summary, the pink velvet cake is more than just a pretty dessert; it's a delightful blend of flavors and textures that can elevate any gathering. With its moist crumb and light whipped cream, this cake will leave everyone craving more. Give it a try and savor its unique charm!
Pink Velvet Cake
Equipment
- Stand Mixer
- cake pans
- microwave
- Mixing Bowl
Ingredients
Cake Ingredients
- 13 oz cake flour
- 12 oz granulated sugar
- 1 teaspoon salt
- 1 tablespoon baking powder
- ½ teaspoon baking soda
- 5 oz egg whites room temperature
- 4 oz vegetable oil
- 10 oz buttermilk room temperature or slightly warm
- 6 oz butter unsalted and softened
- 2 teaspoon vanilla
- 2 drops electric pink food coloring
Stabilized Whipped Cream
- 24 oz heavy whipping cream
- 4 oz powdered sugar
- 2 teaspoons powdered gelatin
- 1 tablespoon cold water
- 1 teaspoon vanilla extract
- 1 teaspoon heavy whipping cream
- 1 cup fresh raspberries optional garnish
Instructions
Cake Preparation
- Preheat the oven to 335º F/168º C.
- Prepare two three 6"x2" cake pans with cake goop or another preferred pan spray. Fill pans about ¾ full with batter.
- Combine flour, sugar, baking powder, baking soda, and salt in a stand mixer and mix for 10 seconds.
- Combine ½ cup of the buttermilk and the oil, then set aside.
- Whisk together the remaining buttermilk, egg whites, food coloring, and vanilla, then set aside.
- Add softened butter to the dry ingredients and mix on low until it resembles coarse sand (about 30 seconds). Add the milk/oil mixture and mix until moistened, then increase to medium and mix for 2 minutes.
- Scrape the bowl and reduce speed to low. Gradually add the egg white mixture in three batches, mixing for 15 seconds between each addition.
- Scrape down the sides and pour the batter into the prepared pans.
- Bake for 35-40 minutes until a toothpick comes out clean. Tap the pan on the countertop to release steam.
- Let the cakes cool in the pans for 10 minutes before flipping them onto a cooling rack.
Stabilized Whipped Cream Preparation
- Sprinkle gelatin over cold water and let bloom for 5 minutes.
- Melt gelatin in the microwave for about 5 seconds.
- In a cold mixing bowl, whip heavy cream to soft peaks.
- Add powdered sugar and vanilla, mixing until combined.
- Drizzle in the gelatin while mixing until stiff peaks form.
Leave a Reply