
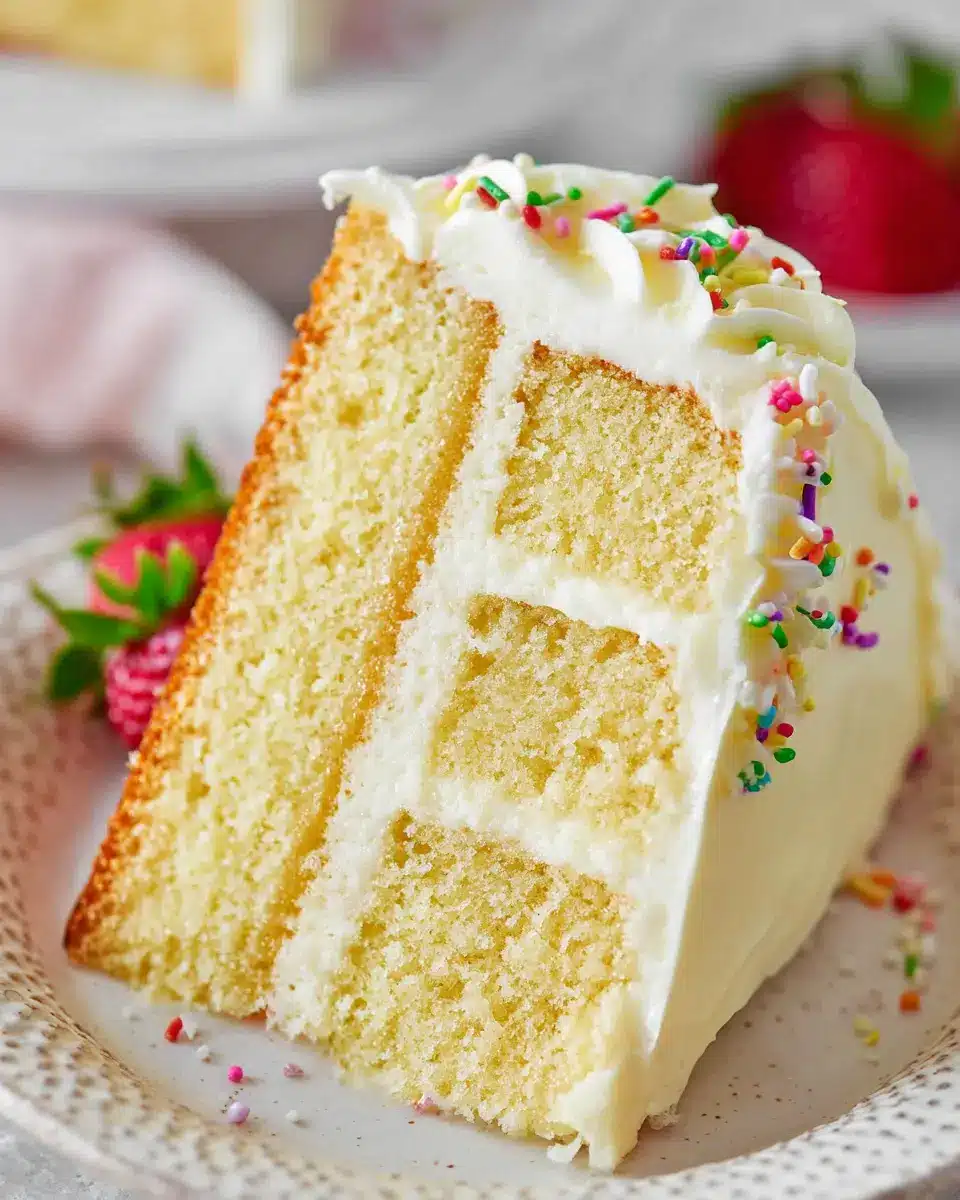
Introduction to Moist Vanilla Layer Cake
When it comes to baking, mastering a moist vanilla layer cake recipe is an essential skill every young professional should cultivate. Why? Because it's more than just a cake; it's a heartfelt one-stop solution for birthdays, promotions, or even just a cozy weekend treat. Picture this: after a long week, you whip up a stunning cake that not only tastes divine but also adds a touch of elegance to your home.
Another reason to perfect this cake is the opportunity it creates to foster deeper connections. Sharing a slice with colleagues or friends can be a delightful way to bond. Did you know that baking can even boost your mood? According to a study from the University of Southern Indiana, the sensory experience of mixing and creating can lower stress levels.
The moist vanilla layer cake is forgiving enough for beginners yet satisfying for seasoned bakers. With just a few key ingredients—like all-purpose flour, butter, and rich vanilla extract—you can create a dessert that looks as good as it tastes. Plus, it makes for excellent leftovers that you can enjoy throughout the week! So roll up your sleeves, preheat your oven, and let's get started on this incredible journey into cake-making.
For the full recipe, check out Moist Vanilla Layer Cake Recipe by Lindsay Conchar.
Ingredients for Moist Vanilla Layer Cake
Making the perfect moist vanilla layer cake starts with gathering the right ingredients. Here’s everything you need to make your cake a success!
Essential ingredients list
- All-Purpose Flour: 2 ½ cups (325g)
This is the main ingredient that gives structure to your cake. - Baking Powder: 2 ½ tsp
Essential for helping the cake rise beautifully. - Salt: ½ tsp
Enhances the flavor and balances the sweetness. - Unsalted Butter: ¾ cup (168g)
Make sure it’s at room temperature for easy mixing. - Vegetable Oil: ¼ cup
Adds moisture to the cake—don’t skip it! - Sugar: 1 ½ cups (310g)
For that sweet, delicious flavor. - Vanilla Extract: 1 tbsp
A key ingredient for that deep vanilla taste. - Eggs: 4 large
Room temperature eggs help create better emulsification. - Milk: 1 ¼ cups (300ml)
Also at room temperature to ensure a smooth batter.
Substitutions and alternatives
Not all ingredients are set in stone! If you're in a pinch, here are some handy alternatives:
- Flour: You can use cake flour for a finer crumb, but adjust the amount slightly.
- Butter: Coconut oil or a vegan butter substitute can work if you prefer a dairy-free version.
- Milk: Substitute with almond milk or soy milk for a dairy-free option.
- Sugar: Coconut sugar or a keto-friendly sweetener can add a twist to the sweetness.
Feel free to experiment! These alternatives allow for personalization without compromising the moisture and flavor of your cake. If you’re curious about measuring flour properly, check out this informative post. Happy baking!
Step-by-step Preparation for Moist Vanilla Layer Cake
Prepare the cake pans
Getting started with your moist vanilla layer cake recipe means ensuring your cake pans are ready for a sweet adventure. Begin by preheating your oven to 350°F (176°C). While that warms up, take three 8-inch round cake pans and prepare them. Cut out parchment paper circles to fit the bottom and place them inside each pan. This little trick helps prevent sticking and keeps your layers intact. Next, grease the sides of the pans well—this will make releasing the cakes a breeze!
Mix the dry ingredients
Now, it's time to combine your dry ingredients to set a solid foundation for your cake. In a medium-sized bowl, whisk together 2 ½ cups of all-purpose flour, 2 ½ teaspoons of baking powder, and ½ teaspoon of salt. Whisking helps aerate the mixture and evenly distribute the baking powder—essential for a fluffy cake! Set this bowl aside for now, as you’ll be introducing it to the rest of the ingredients shortly.
Cream the butter and sugar
Grab a large mixing bowl; it’s time to cream the butter and sugar. Use ¾ cup of unsalted butter (at room temperature), ¼ cup of vegetable oil, and 1 ½ cups of sugar. Using an electric mixer, beat these ingredients on medium speed until they become light and fluffy—aim for about 2-3 minutes. Don’t rush this step; it creates the ideal airy texture that makes your cake moist and delicious. You’ll also want to add 1 tablespoon of vanilla extract to enhance the flavor—your kitchen will smell amazing!
Incorporate eggs and milk
With the butter-sugar mixture ready, it’s time to introduce the eggs. Add 4 large eggs, one at a time, mixing until each is mostly combined before adding the next one. Make sure to scrape down the bowl’s sides to incorporate everything evenly. Once the eggs are in, it’s time to blend in the milk—1 ¼ cups of it, at room temperature. The batter may look a little curdled; that’s normal, so don’t stress! Just be sure not to over-mix; it should be smooth and creamy.
Bake the layers
You’re almost there! Divide your luscious batter evenly among the three prepared cake pans. Bake in the preheated oven for 22-25 minutes or until a toothpick inserted in the center comes out with a few crumbs. Once baked, let the cake layers cool in the pans for about 2-3 minutes before turning them out onto cooling racks. Allow them to cool completely—this will also help in frosting. Trust me, patience pays off in the world of baking!
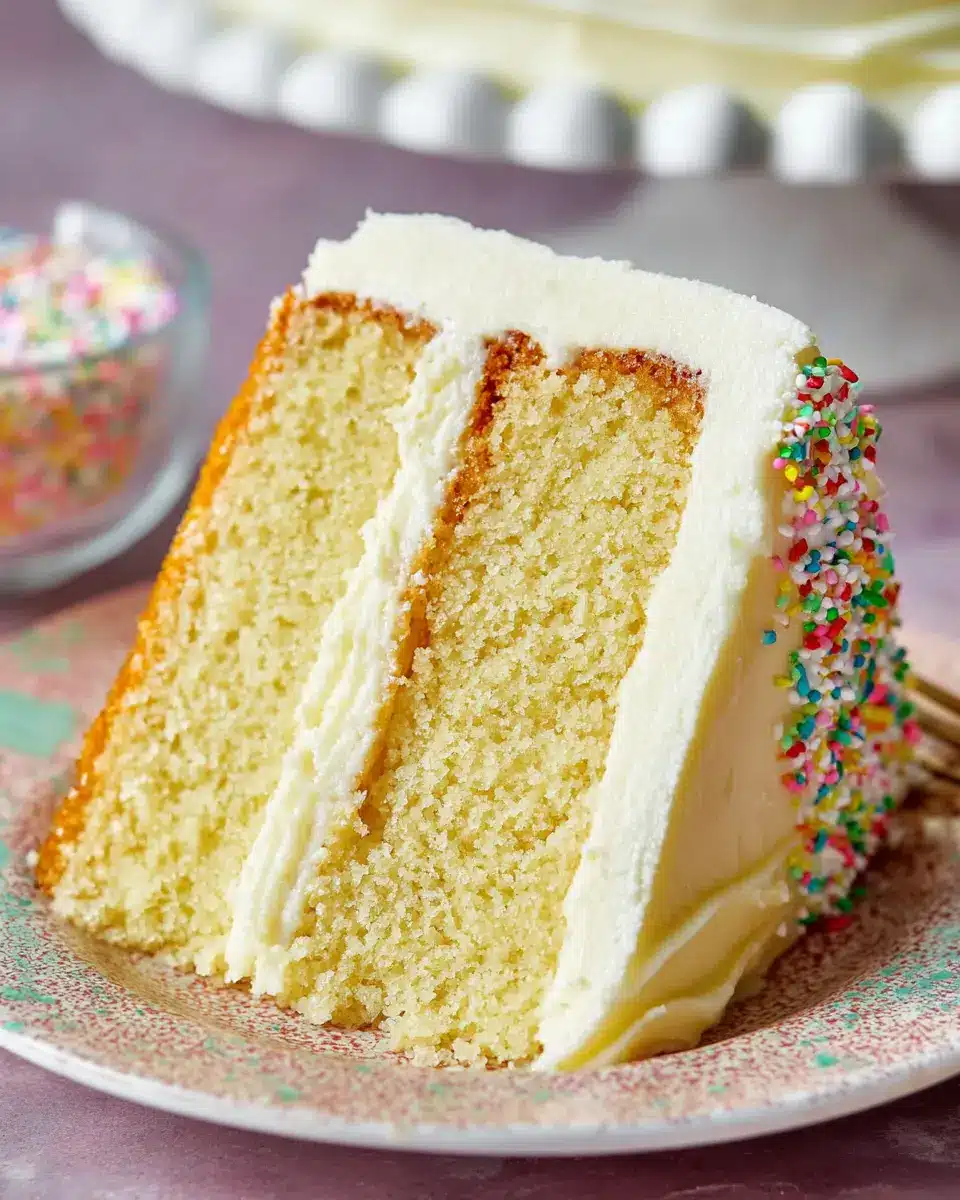
This straightforward preparation is key to achieving a delightful moist vanilla layer cake. When crafted with care, this cake becomes a centerpiece for any occasion. Happy baking!
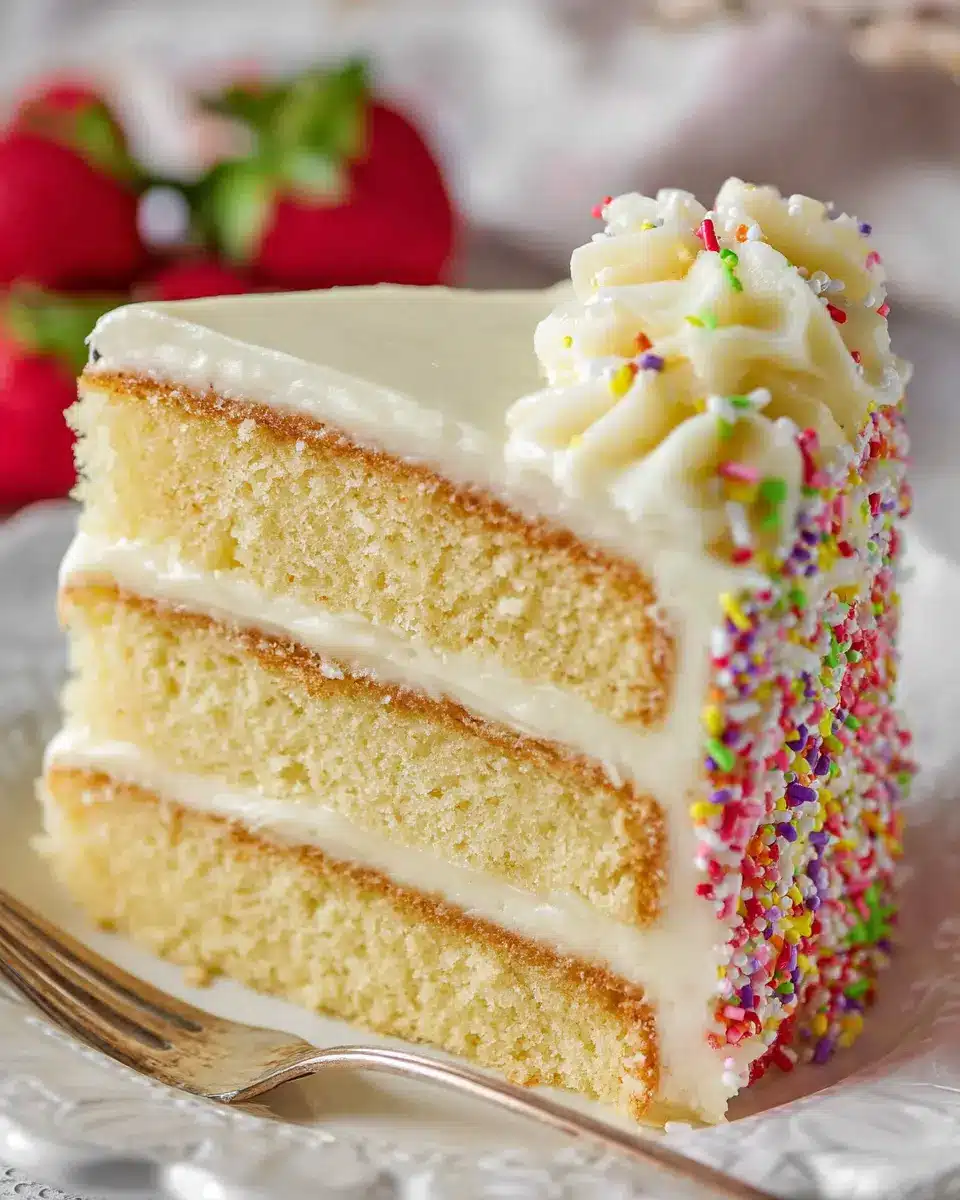
Variations of Moist Vanilla Layer Cake
Adding Fruit Fillings
Want to take your moist vanilla layer cake recipe to the next level? Consider adding delicious fruit fillings! Fresh strawberries, raspberries, or a tangy lemon curd pair beautifully with the vanilla flavor. Simply spread your chosen fruit filling between the layers to add a burst of freshness and a vibrant pop of color. You can also use seasonal fruits for a fun twist, like peaches in summer or apples in fall. Explore seasonal fruit options to elevate your cake!
Making It Chocolate-Flavored
If chocolate is more your speed, you can easily transform your moist vanilla layer cake into a rich chocolate version! Simply swap out a portion of the flour for unsweetened cocoa powder (about ¾ cup), and add in some chocolate chips if you like. Or, try a chocolate frosting to complement the vanilla layers for a beautiful contrast! This twist can satisfy any chocolate cravings while still keeping the essence of that lovely vanilla flavor. Curious about frosting options? Check out this chocolate frosting guide for inspiration.
Baking Tips and Notes for Moist Vanilla Layer Cake
Ensuring a moist texture
To achieve that perfectly moist vanilla layer cake, measure your flour correctly—using the spoon-and-level method is key. Don't skip the room temperature ingredients; they create a better emulsification, leading to a luscious batter. Incorporating vegetable oil along with butter adds moisture, while not overmixing your batter ensures less gluten development, keeping your cake tender.
Avoiding common pitfalls
Watch your bake time; overbaking can lead to dryness. Use a toothpick to check for doneness—the cake should have a few crumbs attached when done. Finally, don’t rush the cooling process; allowing your cakes to cool completely prevents unwanted sogginess. For more tips, check out this guide on avoiding baking blunders. Happy baking!
Serving Suggestions for Moist Vanilla Layer Cake
Pairing with Beverages
When enjoying this moist vanilla layer cake, consider pairing it with refreshing beverages to enhance your experience. A chilled glass of iced tea, lemon-infused sparkling water, or even a rich cup of coffee can balance the sweetness perfectly. For a non-caffeinated option, a fragrant herbal tea adds a lovely contrast. These beverages not only complement the rich vanilla flavors but also elevate your cake moment, making it an ideal choice for casual get-togethers or special celebrations.
Presentation Ideas for Gatherings
Nothing says "celebration" quite like a beautiful cake display. To showcase your moist vanilla layer cake, try presenting it on a decorative cake stand, adding fresh flowers or seasonal fruits around the base for a pop of color. You can also use a dramatic cake dome for an elegant touch. For gatherings, consider serving individual slices on colorful plates; it adds charm and makes it easy for guests to indulge.
Feel free to check out more dessert presentation ideas here: Elegant Cake Presentations.
Time Breakdown for Moist Vanilla Layer Cake
Preparation time
Get started with 1 hour and 20 minutes of prep, which involves mixing your ingredients and prepping the cake pans. It’s a great time to enjoy some tunes or sip on coffee as you bake!
Baking time
You’ll spend about 25 minutes in the oven, allowing the moist vanilla layer cake to rise to perfection. Use this time to clean up or prepare your frosting.
Total time
In just 1 hour and 45 minutes, you’ll have a stunning cake ready to impress! Whether it’s for a special occasion or just a sweet treat for yourself, this cake is sure to delight.
Nutritional Facts for Moist Vanilla Layer Cake
Calories per slice
Enjoying a slice of this moist vanilla layer cake recipe means indulging in roughly 977 calories. It's quite the treat for special occasions or a well-deserved dessert after a long week!
Sugar content
With a delightful sweetness, each slice contains about 107.2 grams of sugar. This scrumptious sugar content highlights just how flavorful and satisfying this cake can be!
Other key nutrients
Beyond calories and sugar, this delicious cake also offers:
- Fat: 51.1 g
- Carbohydrates: 127.9 g
- Protein: 5.8 g
- Sodium: 223.3 mg
- Cholesterol: 175.4 mg
While it’s undeniably rich, sharing a slice at a celebration makes it all the more special. For more insightful nutrition details, consider checking out resources like NutritionData.
FAQs about Moist Vanilla Layer Cake
How can I ensure my cake stays moist?
To keep your moist vanilla layer cake from drying out, consider these tips:
- Don’t overbake: Keep an eye on your cakes as they bake. A toothpick should come out with a few moist crumbs, not clean.
- Use room temperature ingredients: This helps create a smoother batter and leads to a fluffier texture.
- Syrup soak: For an extra moisture boost, brush simple syrup (1:1 sugar and water mixture) between layers before frosting.
What’s the best way to store leftovers?
Store your moist vanilla layer cake in an airtight container at room temperature for up to 3-4 days. If you need to keep it longer, refrigerate it for freshness, but always wrap it well to prevent it from drying out.
Can I make this cake in advance?
Absolutely! You can bake the layers a day or two in advance and wrap them tightly in plastic wrap. Just let them cool completely before wrapping to avoid sogginess. Frost your cake on the day you plan to serve for the best texture and flavor!
For more tips, check out resources on optimal cake storage here. Happy baking!
Conclusion on Moist Vanilla Layer Cake
Final thoughts on baking this delightful layer cake
Creating this moist vanilla layer cake is a true delight that you'll want to share with family and friends. Each slice is filled with tender vanilla cake and rich buttercream, making it perfect for any occasion. Don’t hesitate to try this recipe—you’ll be amazed at how quickly this cake becomes a favorite! Whether it's a birthday celebration or just a sweet treat, your baking journey will be well worth it. Happy baking!
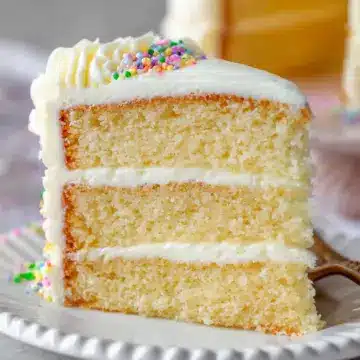
Moist Vanilla Layer Cake Recipe
Equipment
- 8 inch cake pans
- Mixing bowls
- Mixer
- spatula
- Serrated knife
Ingredients
Vanilla cake
- 2.5 cups all purpose flour measured properly
- 2.5 teaspoon baking powder
- 0.5 teaspoon salt
- 0.75 cups unsalted butter room temperature
- 0.25 cups vegetable oil
- 1.5 cups sugar
- 1 tablespoon vanilla extract
- 4 large eggs room temperature
- 1.25 cups milk room temperature
Vanilla Buttercream
- 2.5 cups unsalted butter room temperature
- 10 cups powdered sugar
- 1 tablespoon vanilla extract
- 6-8 tablespoon heavy cream
- Pinch of salt
- Sprinkles for decorating
Instructions
For the Cake
- Prepare three 8 inch cake pans with parchment paper circles in the bottom and grease the sides. Preheat oven to 350°F (176°C).
- Combine the flour, baking powder and salt in a medium sized bowl and set aside.
- Add the butter, sugar, oil and vanilla extract to a large mixer bowl and beat together until light in color and fluffy, about 2-3 minutes. Do not skimp on the creaming time.
- Add the eggs one at a time, mixing until mostly combined after each. Scrape down the sides of the bowl as needed to be sure all ingredients are well incorporated.
- Add half of the dry ingredients to the batter and mix until mostly combined.
- Slowly add the milk and mix until well combined. The batter will look curdled, but that’s ok.
- Add the remaining dry ingredients and mix until well combined and smooth. Scrape down the sides of the bowl as needed to be sure all ingredients are well incorporated. Do not over mix the batter.
- Divide the batter evenly between the cakes pans and bake for 22-25 minutes, or until a toothpick comes out with a few crumbs.
- Remove the cakes from the oven and allow to cool for about 2-3 minutes, then remove to cooling racks to cool completely.
For the Frosting
- To make the frosting, beat the butter until smooth.
- Slowly add half of the powdered sugar and mix until smooth.
- Add the vanilla extract, 4-5 tablespoons of heavy cream, and salt and mix until smooth.
- Slowly add the remaining powdered sugar and mix until smooth. Add additional heavy cream, as needed to get the right consistency of frosting.
To Assemble the Cake
- To put the cake together, use a large serrated knife to remove the domes from the top of the cakes so that they’re flat.
- Place the first cake on a serving plate or a cardboard cake round.
- Spread about 1 cup of frosting evenly on top of the cake.
- Add the second layer of cake and another cup of frosting.
- Top the cake with the remaining layer and frost the outside of the cake.
- Press sprinkles into the sides of the cake.
- Pipe swirls of frosting around the top edge of the cake.
- Add a few more sprinkles to the top of the cake. Store in an air-tight container.
Leave a Reply