
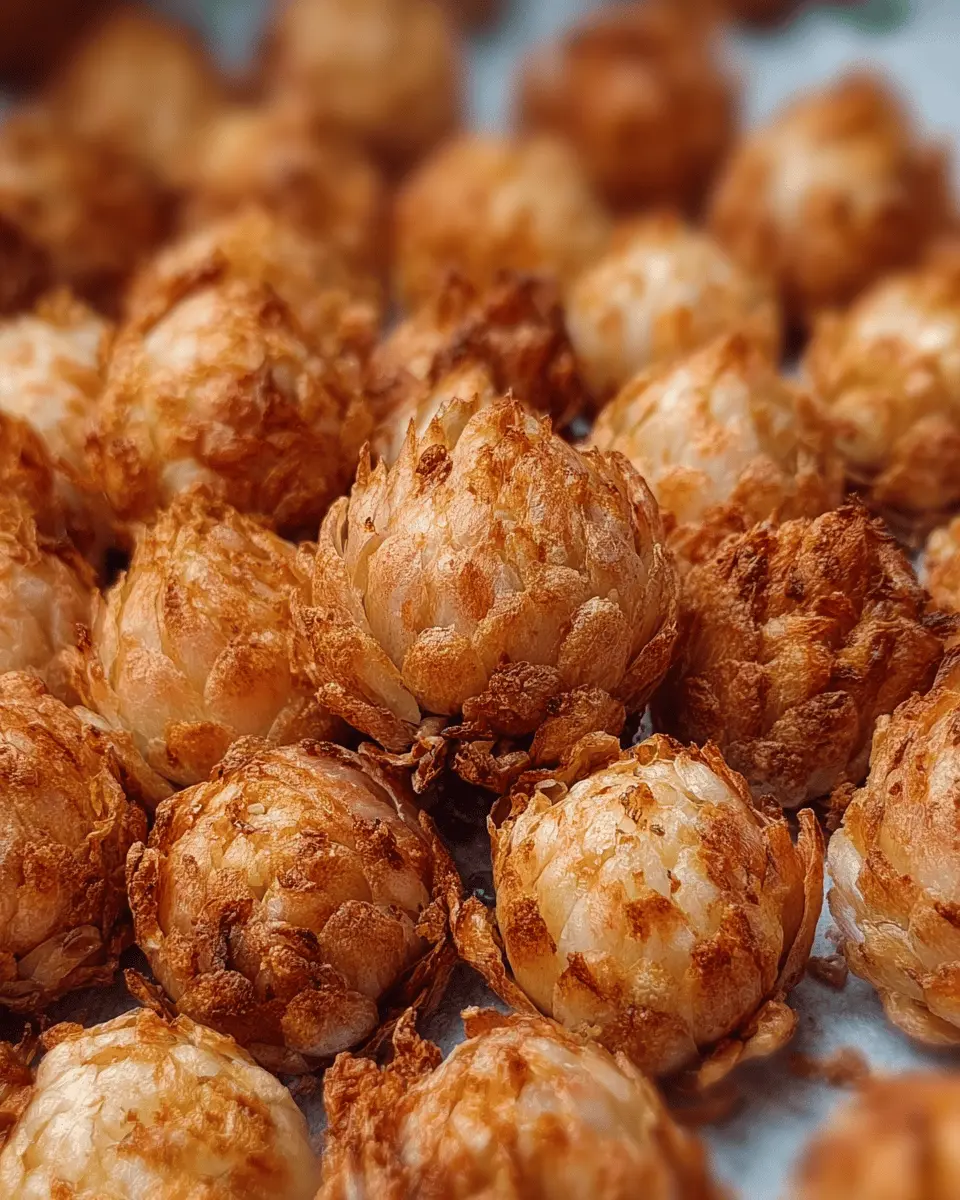
Introduction to Mini Blooming Onions
Mini blooming onions are not just delicious; they’re an exciting twist on a classic favorite! Whether you're hosting a game night or simply snacking on a Friday evening, these little gems are a must-try at home. Unlike the traditional bloomin’ onion found at fairs, which can be a bit daunting to make, mini blooming onions offer all the fantastic flavor with much less effort.
Why mini blooming onions are a must-try at home?
One of the standout features of mini blooming onions is their portability. These bite-sized treats capture the essence of the classic carnival snack — crispy, flavorful, and utterly indulgent — but they're perfect for sharing. Imagine serving them at a gathering, accompanied by your favorite dipping sauces; they’re bound to become the star of the show!
Furthermore, the simplicity of the recipe allows you to customize seasonings according to your taste. Feel free to experiment with different spices, from smoky paprika to a kick of heat with cayenne. Plus, with frozen pearl onions as the base, the prep work is minimal, making them feasible for even the busiest schedules.
So, if you’re ready for an easier way to experience the joy of fried food, let’s dive into making these delightful mini blooming onions! For more on onion varieties and their culinary uses, check out sources like The Spruce Eats for some great tips.
Ingredients for Mini Blooming Onions
Essential ingredients for that carnival flavor
To recreate the irresistible taste of mini blooming onions, you’ll need some essential components that deliver that classic carnival experience right at home. Here’s what you’ll need:
- 12 ounces frozen pearl onions (thawed and well-drained)
These little gems are the star of the show, mimicking the traditional blooming onion's shape. - 2 eggs
These act as the binder for the batter, ensuring it sticks to the onions. - 1 cup flour
For coating the onions, giving them that crunchy texture. - 2 teaspoons cayenne pepper
Adds a delightful kick that captures that fair food essence. - 2 teaspoons paprika
For a subtle smokiness and vibrant color. - 2 teaspoons onion powder and garlic powder
Boosts the overall onion flavor and adds depth. - 1 teaspoon black pepper and salt
Basic seasonings that need no introduction. - Vegetable or canola oil for frying
Aim for about 1 cup to ensure a perfect fry!
Optional ingredients for a personalized touch
You can easily tailor your mini blooming onions to fit your taste preferences. Consider adding:
- Dried herbs like oregano or thyme for extra flavor.
- Parmesan cheese in the flour mix for a cheesy crunch.
- A drizzle of hot sauce on top after frying for an added kick.
Feel free to experiment! For more tips on flavor combinations, check out recipe ideas at Food Network and Serious Eats. Happy cooking!
Step-by-Step Preparation of Mini Blooming Onions
Mini blooming onions are not just a fun snack; they're a delightful blend of crispy golden exterior and tender onion flavor that will make your taste buds sing. Follow these steps to create your own batch easily and enjoyably.
Preparing the Pearl Onions
First things first, let’s get those pearl onions ready. Start by thawing your 12 ounces of frozen pearl onions (trust me, this saves you so much time!). Once they’re thawed, drain them well and lay them out on some paper towels. This step is crucial, as it ensures that your onions are dry, giving you that perfect crispy finish when frying. If you're looking for tips on choosing quality pearl onions, check out this guide.
Mixing the Batter
While your onions are drying, let's make the batter. In a mixing bowl, beat the two eggs until they’re well mixed and slightly frothy. In a separate bowl, combine 1 cup of all-purpose flour with the spices: 2 teaspoons of cayenne pepper, 2 teaspoons of paprika, 2 teaspoons of onion powder, 2 teaspoons of garlic powder, 1 teaspoon of black pepper, and 1 teaspoon of salt. This flavorful blend is what gives your mini blooming onions that irresistible kick! Don't skip the spices—they're key to the flavor explosion you want in every bite.
Heating the Oil to the Perfect Temperature
Next, it's time to heat the oil. Choose a skillet (a six-inch pan works well) and pour in about 1 inch of vegetable or canola oil. Heat the oil over medium-low heat until it reaches between 370 to 400 degrees Fahrenheit. This temperature is essential for achieving that golden brown color and crispy texture. If you're unsure about the right temperature, a candy thermometer can be a great tool—though a drop of batter can work as a quick test as well.
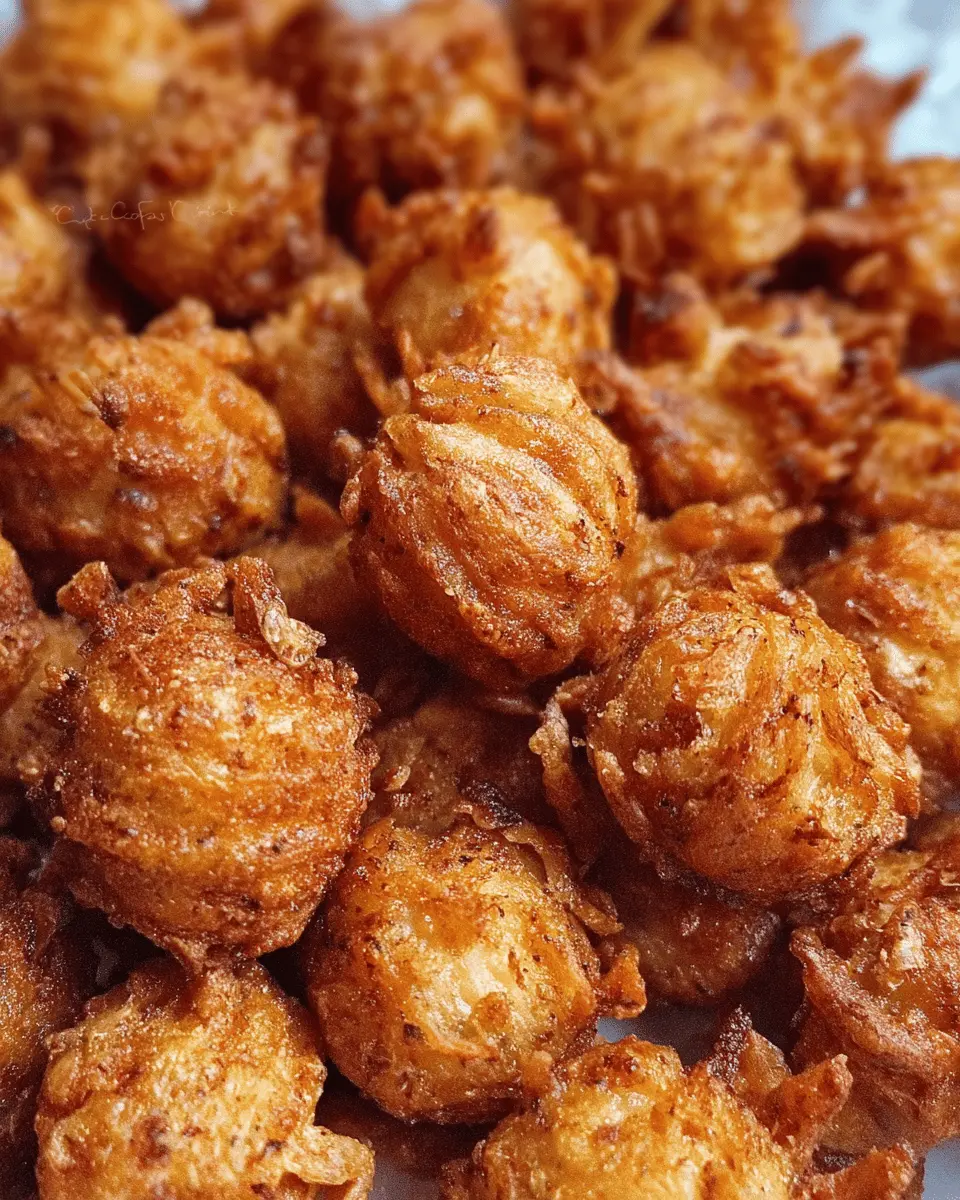
Coating and Frying the Onions
Now comes the fun part! Take the dry pearl onions and coat them in the beaten eggs. After they’re well-coated, transfer them into the bowl of flour, making sure each onion gets a nice, even coating. Tap off any excess flour and carefully drop the coated onions into the hot oil. Fry them for about five to eight minutes, or until they reach your desired level of deep brown perfection. For extra safety, use a slotted spoon to avoid any hot oil splashes.
Draining and Cooling Off
Once your onions are beautifully fried, it’s time to drain them. Use that prepared plate lined with paper towels to lay your fried onions down. This will absorb any excess oil, leaving your mini blooming onions crispy and delicious without being overly greasy. Let them cool for a minute, and they’re ready to serve! Pair them with your favorite dipping sauce for an irresistible snack that will keep everyone coming back for seconds.
And there you have it—your own mini blooming onions! Enjoy the process, and don’t hesitate to experiment with different spices to call your own!

Variations on Mini Blooming Onions
Spicy Mini Blooming Onions for Heat Lovers
If you crave a bit of kick in your snacks, try adding extra cayenne pepper or a dash of hot sauce to the batter of your mini blooming onions. This fiery twist not only elevates the flavor but also satisfies those spicy cravings—perfect for sharing at game night. For even more heat, consider garnishing them with chili flakes or serving with a spicy dipping sauce like sriracha mayo. It'll turn your classic appetizer into a bold experience, ensuring every bite packs a punch.
Cheesy Mini Blooming Onions for a Twist
For cheese lovers, adding a cheesy element can transform your mini blooming onions into an irresistible delight. Mix shredded cheddar or mozzarella into your flour mixture, or try filling some of the onions with cream cheese before frying them. The gooey, melty interior complements the crispy exterior perfectly. Pair these cheesy bites with a cool ranch dip for an extra layer of flavor that makes every bite a savory treat. Don’t hesitate to experiment—maybe a sprinkle of parmesan or a dash of garlic cheese powder for an added layer of yum!
These variations not only keep things interesting but will also impress your friends and family. What will you choose to try first?
Cooking Tips and Notes for Mini Blooming Onions
Tips for Achieving a Crispy Coating
To ensure your mini blooming onions have that perfect crispy exterior, start by thoroughly draining your thawed onions. Excess moisture can result in soggy coatings. When coating the onions, press them gently into the flour mixture to ensure it adheres well. For an extra crunch, consider using panko bread crumbs in place of some of the flour! Feeling adventurous? Add a sprinkle of parmesan cheese to the flour mix for extra flavor.
Notes on Oil Temperature and Frying Techniques
Getting the oil temperature right is crucial for beautifully fried mini blooming onions. Aim for 370 to 400 degrees Fahrenheit, as this hot oil will create that golden-brown color you desire. Use a candy thermometer for accuracy. Fry in small batches to prevent the oil temperature from dropping, which can lead to greasy onions. Always make sure to carefully monitor them to prevent any burning – nobody likes that overly crispy surprise!
For more frying techniques, you can check out resources from the Joy of Cooking. Happy frying!
Serving Suggestions for Mini Blooming Onions
Perfect dipping sauces to accompany the onions
When serving mini blooming onions, the right dipping sauce can elevate the flavor experience. Consider these delicious options:
- Spicy Ranch: Mix ranch dressing with a dash of hot sauce for a creamy kick.
- Garlic Aioli: Blend mayonnaise, minced garlic, and lemon juice for a rich dip.
- Chipotle Sauce: Combine sour cream and chipotle peppers in adobo for that smoky flavor.
- Honey Mustard: A sweet and tangy sauce to balance the savory crunch of the onions.
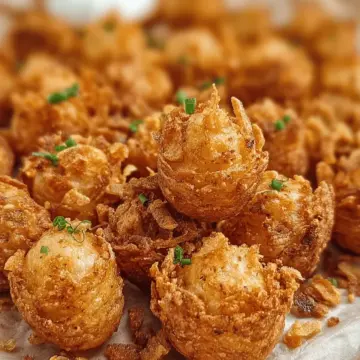
Creative ways to serve mini blooming onions
Why stop at just dipping? Here are some fun ideas to enhance your mini blooming onions presentation:
- Platter Party: Arrange them on a colorful serving platter alongside a variety of dipping sauces for a vibrant appetizer spread.
- Burger Toppers: Use these delightful onions as a zesty topping on your favorite burger for an added crunch.
- Salad Garnish: Sprinkle a handful over a fresh green salad for a gourmet twist.
- Snack Board: Create a game-day snack board with mini blooming onions, cheese, and veggies for a perfect nibble.
With these servings suggestions, your mini blooming onions will not only taste great but also look fantastic! For more fun ideas, check out this entertaining guide on serving appetizers that wow your guests.
Time Breakdown for Mini Blooming Onions
Preparation Time
Getting your mini blooming onions ready takes about 15 minutes. This includes draining the pearl onions and prepping your batter.
Cooking Time
Frying them up in small batches will take around 5 to 8 minutes per batch. So if you're making several, factor in some extra time!
Total Time
In total, you’re looking at roughly 30 minutes from start to finish. Perfect for those busy evenings when you're craving something delicious and fun!
Need a little inspiration for dipping sauces to serve with your blooming onions? Try a tangy ranch or a zesty garlic dip for an extra flavor kick! Check out this dipping sauce guide for more ideas!
Nutritional Facts for Mini Blooming Onions
When it comes to satisfying cravings for fair food, these mini blooming onions offer a delightful crunch without too much guilt. Here’s a glance at their nutritional profile:
Calories
Each serving contains approximately 150 calories, making them an indulgent yet manageable appetizer. Perfect for sharing or enjoying solo!
Protein
With about 3 grams of protein per serving, these crispy bites provide a modest boost to your snack time while still being primarily veggie-based.
Sodium
Keep in mind that the sodium content is around 300 milligrams, largely due to the seasoning. If you're watching your salt intake, you might consider reducing the salt in the batter.
These mini blooming onions, while delicious, should be enjoyed as part of a balanced diet. For a deeper dive into nutritional information, the USDA's FoodData Central is a great resource to explore the details of ingredients.
So, are you ready to bring the fun of the fair to your table?
FAQs about Mini Blooming Onions
Can I use fresh onions instead of frozen?
Absolutely! While frozen pearl onions are convenient for this recipe, using fresh onions will give you a delightful crunch and fresh flavor. Just be sure to peel and cut the onions properly for that perfect blooming effect. You may need to parboil them briefly to soften just a tad before battering and frying.
What are the best dipping sauces?
When it comes to pairing with mini blooming onions, the right dipping sauce can make all the difference! Here are some crowd-pleasers:
- Creamy Ranch Dressing
- Honey Mustard
- Spicy Ketchup
- Aioli for a gourmet touch
Experiment with these or create your own combo!
How can I store leftover mini blooming onions?
If you happen to have leftovers (not likely!), store them in an airtight container in the fridge for up to two days. Reheat them in an oven to maintain their crispiness. Avoid the microwave, as it tends to make them soggy. Enjoy them as a snack or a quick appetizer later! For more tips on storing fried foods, check out this informative guide on Storing Fried Foods Properly.
Conclusion on Mini Blooming Onions
In summary, mini blooming onions are a delightful twist on a classic fair food that brings all the fun right to your kitchen without the hassle of traditional frying. They make for an excellent appetizer or snack, perfect for gatherings or movie nights. Give this recipe a try and enjoy your own homemade carnival treat!
For more ideas on how to elevate your snacking game, check out these delicious dipping sauces that pair wonderfully with fried foods!
Mini Blooming Onions
Equipment
- skillet
- candy thermometer
- Slotted spoon
Ingredients
Onions and Batter
- 12 ounces frozen pearl onions thawed and drained
- 2 eggs
- 1 cup flour
- 2 teaspoons cayenne pepper
- 2 teaspoons paprika
- 2 teaspoons onion powder
- 2 teaspoons garlic powder
- 1 teaspoon black pepper
- 1 teaspoon salt
- 1 cup vegetable oil for frying
Instructions
Preparation and Cooking
- Drain the thawed pearl onions well, and lay them on some paper towels to help dry them as much as possible.
- In a bowl, beat the eggs, and set it aside.
- In another bowl, stir the flour and seasonings together and set it aside.
- Add oil to a skillet (I used a six-inch pan and fried in batches) to about one inch in depth. Heat it over medium-low heat until the oil registers 370 to 400 degrees on a candy thermometer.
- Prepare a plate by lining it with paper towels, and set it aside.
- Coat the onions in the beaten eggs, and then transfer them to the bowl with the flour, tossing to coat them completely.
- Tap off any extra flour and carefully drop the coated onions into the hot oil. Let them fry for five to eight minutes or until the onions reach a deep brown color to your liking.
- Remove the fried onions from the oil with a slotted spoon and place them on the lined plate to drain.
- Serve the onions while hot, along with your favorite dipping sauce.
Leave a Reply